In today’s competitive digital marketplace, tracking user interactions has become the backbone of performance marketing. Without accurate data, brands risk overspending, misallocating ad budgets, and losing visibility into what truly drives revenue.
Recent studies show that businesses with robust conversion tracking see a 15-20% higher ROI on their ad spend (ClickPatrol). Yet, many Shopify merchants underreport conversions due to tracking gaps – resulting in wasted budget and ineffective optimization.
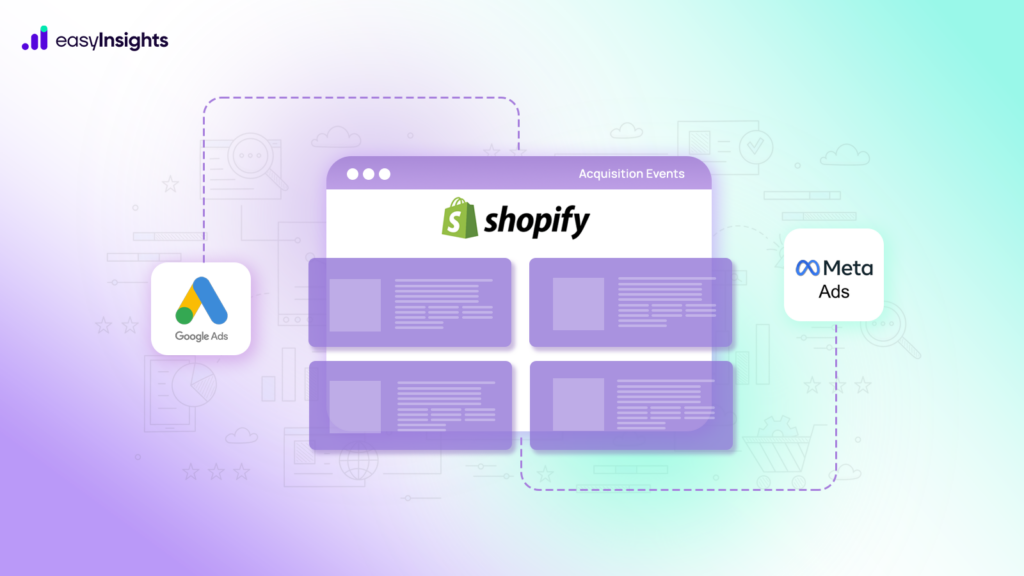
In this guide, we will explore how to set up and send acquisition events from Shopify to Meta and Google Ads, ensuring accurate tracking and data-driven decision-making.
Jump ahead to:
What Are Acquisition Events
Acquisition events refer to key user interactions that indicate interest, engagement, or intent to convert on a website. These events help brands track how target customers interact with their site, allowing them to measure the effectiveness of their marketing campaigns. Common acquisition events include:
- Page Views – Tracking users who visit specific pages, such as product pages or landing pages.
- Add to Cart – Monitoring when users add a product to their shopping cart.
- Initiate Checkout – Identifying users who start the checkout process but may not complete it.
- Sign-ups – Tracking registrations for newsletters, free trials, or account creations.
- Purchases – Recording completed transactions as a key conversion event.
Why Do They Matter?
- Campaign Optimization: Meta and Google’s algorithms need event data to optimize delivery.
- Budget Efficiency: Allocate more spend to the channels driving high-value actions.
- Personalization: Retarget cart abandoners or build lookalike audiences from buyers.
- Attribution Accuracy: Understand the role of each channel in the path-to-purchase.
📊 Stat to Note: Shopify merchants who implement accurate acquisition tracking see up to 20% improvement in reported conversions across Meta Ads and Google Ads
Why Shopify Tracking Often Shows Discrepancies
Even with Pixels or Tags installed, Shopify numbers often don’t align with Meta or Google. Here’s why:
- Attribution Differences – Shopify uses last-click attribution, while Meta/Google use multi-touch models. This creates inflated or reduced numbers depending on the customer journey.
- Cross-Device Gap – Meta can track when a user clicks an ad on mobile and later purchases on desktop. Shopify cannot, leading to lost attribution.
- Privacy Restrictions – With iOS 14.5+, browser-based tracking via Pixel alone underreports up to 40% of events.
- Ad Blockers & Cookie Loss – Pixel-only setups fail when users block cookies, scripts, or use private browsing.
- Duplicate/Missing Events – Misconfigured setups may either overcount or miss conversions entirely.
Solution: Use hybrid tracking (Pixel/Tag + Server-Side API) and validate via Events Manager (Meta) or Tag Assistant (Google).
Meta vs Google Ads Acquisition Tracking
Both Meta and Google Ads help brands track user acquisition, but they differ in tracking methods, attribution models, and data collection approaches. Here’s a comparison:
| Feature | Meta Acquisition Tracking | Google Ads Acquisition Tracking |
| Tracking Method | Uses the Meta Pixel and Conversion API (CAPI) to track user actions . | Uses Google Ads conversion tracking and GA4 to track users. |
| Data Collection | Primarily relies on browser-based tracking (Pixel) and server-side tracking (CAPI) to capture user interactions. | Uses cookies, Google Click ID (GCLID), and GA4 event tracking for acquisition tracking. |
| Attribution Model | Uses a 7-day click and 1-day view attribution window (default), with options for last-click, linear, and other models. | Supports last-click, data-driven, first-click, linear, time decay, and position-based attribution models for more flexibility. |
| User Journey Coverage | Focuses on tracking social media-driven acquisitions, emphasizing engagement before conversion. | Covers the entire Google ecosystem, tracking acquisitions across search, video, display, and shopping touchpoints. |
| Cross-Device Tracking | Uses Facebook’s advanced matching and CAPI to track users across multiple devices and sessions. | Uses Google Signals and GA4 to track users across devices and platforms. |
| Privacy & Data Restrictions | Heavily impacted by iOS 14.5+ privacy changes, requiring server-side tracking for better accuracy. | Less impacted by iOS restrictions, as it relies on first-party data and Google’s ecosystem for tracking. |
| Optimization for Acquisition | Focuses on social-driven intent, relying on audience targeting, lookalike audiences, and engagement-based acquisition. | Optimizes for search intent-driven acquisition, using smart bidding, keyword intent, and audience lists. |
65% of consumers use multiple devices before purchasing (Analyzify). This makes cross-device tracking via CAPI + GA4 essential.
Also Read: How To Set Up Conversion Tracking in Google Ads for Shopify: A Complete Overview
Setting Up Meta Acquisition Events in Shopify
Tracking acquisition events in Meta Ads is essential for optimizing campaigns and understanding user behavior. By integrating Shopify with Meta, brands can monitor important user actions like product views, add-to-cart interactions, and purchases. Here is a step-by-step guide to setting up Meta acquisition events in Shopify.

Step 1: Connect Shopify with Meta Pixel
The Meta Pixel is a tracking tool that records user activity on your Shopify store and sends this data to Meta Ads Manager. This allows brands to analyze customer behavior, improve ad targeting, and enhance conversion tracking.
How it works:
- Log in to Shopify Admin: Go to your Shopify dashboard.
- Open Customer Events: Click Settings → Customer events.
- Connect Meta Pixel: Click Connect, then choose Facebook Pixel.
- Login to Facebook: Sign in to your Facebook Business Manager account.
- Select/Create Pixel: Pick an existing Pixel or create a new one.
- Enable Data Sharing: Choose Maximum for the best tracking accuracy.
- Save & Verify: Click Save, then confirm data flow in Meta Events Manager.
Once the Meta Pixel is connected, it will begin tracking default events, but enabling CAPI ensures even more reliable tracking.
Step 2: Enable Conversion API (CAPI) for Better Tracking
The CAPI works alongside the Meta Pixel to improve event tracking. Unlike the Pixel, which relies on browser data, CAPI sends event data directly from Shopify’s server to Meta, ensuring higher accuracy.
How to Enable it:
- Go to Shopify Admin Panel: Click “Settings” and navigate to “Customer events.”
- Select Your Meta Pixel: Click on the connected Pixel from Step 1.
- Enable Conversion API: Check the option to turn on Meta’s CAPI.
- Select Data-Sharing Level: Choose Maximum to send both browser and server-side data for better tracking.
- Save Changes: Shopify will now send event data through both the Pixel and CAPI.
By implementing CAPI, brands track customer actions even if users opt out of browser tracking, leading to more accurate attribution and improved ad performance.
Also Read: Facebook Conversions API ( CAPI ) – Comprehensive Guide for Performance Marketers
Step 3: Configure Standard Events (Purchase, Add to Cart, etc.)
Meta supports several standard events that help brands track user activity on their website. Shopify automatically sends some of these events when integrated with Meta, but you can configure additional ones for more detailed insights.
Common Standard Events in Shopify:
- PageView – When a user visits any page.
- View Content – When a user views a specific product or collection page.
- Add to Cart – When an item is added to the shopping cart.
- Initiate Checkout – When a user starts the checkout process.
- Purchase – When a user completes a transaction.
How to Configure Standard Events:
- Go to Meta Events Manager: Log in to your Facebook Business Manager and open Events Manager.
- Select Your Shopify Pixel: Click on the Pixel connected to Shopify.
- Check Auto-Tracked Events: Shopify automatically tracks core events like Purchase, Add to Cart, and View Content.
- Set Up Additional Custom Events (Optional): If needed, create custom events for tracking unique actions, such as newsletter sign-ups or coupon redemptions.
- Test Events in Meta Debugger: Use the Test Events tool in Events Manager to ensure data is being sent correctly.
Proper event configuration ensures that Meta receives detailed data, allowing advertisers to retarget users effectively and optimize ad campaigns.
Step 4: Verify Event Tracking Using Meta Events Manager
Once the Meta Pixel and Conversion API are set up, it is crucial to verify that events are being tracked correctly. The Meta Events Manager provides real-time insights into event tracking, helping brands ensure data accuracy.
How to Verify :
- Go to Facebook Events Manager: Log in to your Facebook Business Manager and navigate to Events Manager.
- Select Your Shopify Pixel: Click on the Pixel ID connected to your Shopify store.
- Check Incoming Events: The dashboard will display real-time event tracking data, including PageView, Add to Cart, and Purchases.
- Use the Test Events Tool: Click on “Test Events,” open your Shopify store in another tab, and perform key actions (e.g., adding a product to the cart). The tool should show event triggers in real time.
- Troubleshoot Any Issues:
- If an event is not firing, check that the Pixel ID is correctly installed in Shopify.
- If duplicate events appear, ensure that Pixel tracking and CAPI tracking are not overlapping incorrectly.
- If events are missing, adjust your data-sharing settings in Shopify.
Once the verification process is complete, brands can confidently use event data for ad optimization, audience retargeting, and performance analysis.
Also Read: How to Use Shopify Data for Meta Ads
Setting Up Google Acquisition Events in Shopify
Tracking acquisition events in Shopify through Google Ads and GA4 (Google Analytics 4) ensures accurate measurement of user interactions and conversions. Below is a detailed step-by-step guide to setting up Google acquisition event tracking in Shopify.
Step 1: Set Up Google Tag Manager (GTM) in Shopify
Google Tag Manager allows you to manage tracking codes without modifying your Shopify theme directly.
Create a Google Tag Manager Account:
- Go to Google Tag Manager and sign in.
- Click Create Account, enter your brand’s details, and select Web as the target platform.
- Accept the terms and conditions.
Add GTM to Shopify:
- Copy the GTM container code provided by Google.
- In Shopify, go to Online Store → Themes → Edit Code.
- Paste the GTM script.
- Save changes.
Step 2: Configure Google Ads Conversion Tracking
Once GTM is installed, you need to set up conversion tracking for Google Ads.
Create a Conversion Action in Google Ads:
- Go to Google Ads → Tools & Settings → Conversions.
- Click New Conversion Action → Website.
- Enter your Shopify store URL and let Google scan your site.
- Select the event type (e.g., Purchase, Lead, Add to Cart, etc.).
- Choose the tracking method:
- Google Tag Manager (recommended) – Select “Use Google Tag Manager” for easier implementation.
- Google Tag Manager (recommended) – Select “Use Google Tag Manager” for easier implementation.
- Click Create and Continue, then copy the Conversion ID and Conversion Label.
Step 3: Set Up Google Ads Conversion Tracking in GTM
- In Google Tag Manager, create a new tag:
- Click Tags → New.
- Choose Google Ads Conversion Tracking.
- Enter the Conversion ID and Conversion Label from Google Ads.
- Set up the trigger:
- Click Triggering → New.
- Select Page View or Custom Event (e.g., “purchase”, “thankyou” page).
- Configure it to fire on the order confirmation page (/checkout/thankyou).
- Save and publish the container in GTM.
Step 4: Set Up Google Analytics 4 (GA4) Acquisition Tracking
GA4 helps track all acquisition sources, including Google Ads, organic search, and referral traffic.
Create a GA4 Property
- Go to Google Analytics → Admin → Create Property.
- Select GA4 and complete the setup.
- Copy the GA4 Measurement ID.
Add GA4 to GTM
- In GTM, create a new tag:
- Click Tags → New.
- Select Google Analytics: GA4 Configuration.
- Enter the GA4 Measurement ID.
- Set up the trigger:
- Choose All Pages to track every visit.
- Choose All Pages to track every visit.
- Save and publish the GTM container.
Step 5: Set Up Acquisition Events in GA4
Acquisition events help measure how users arrive at your store and interact before converting.
Enable Enhanced Conversions
- In Google Analytics → Admin → Data Streams, enable Enhanced Measurement to track page views, scrolls, outbound clicks, and more.
- Make sure Google Signals is enabled for cross-device tracking.
Create Custom Events for Shopify
- In Google Analytics → Events, click Create Event.
- Define custom events such as:
- session_start (tracks new visitors)
- first_visit (tracks new users)
- purchase (tracks successful orders)
- Set conditions based on Shopify’s URLs (e.g., /thank_you page for purchases).
Step 6: Test and Validate Tracking
Before launching campaigns, verify that all events are tracking correctly.
Use Google Tag Assistant
- Install the Google Tag Assistant Chrome extension.
- Navigate your store to check if the Google Tags fire properly.
Use a Third-Party Tool: EasyInsights
From Shopify , EasyInsights automatically sends acquisition events like purchases, checkouts, and add-to-cart in real-time to your ad platform(Meta, Google ads) – no developer support required.
- Automatically track and send your Shopify acquisition events
- Sync them with Meta’s Conversions API or Google’s Enhanced Conversions
- Build high-performing retargeting and lookalike campaigns
- Improve attribution and optimize ROAS with real-time data flow
Whether you’re retargeting cart abandoners or tracking new customers from first click to final conversion, EasyInsights ensures your acquisition data from Shopify flows directly into your ad platforms with accuracy, speed, and zero hassle.
Conclusion
Accurate tracking is the foundation of successful digital marketing. Ensuring your pixel or tag fires correctly, diagnosing missing conversion data, and debugging tracking issues in Shopify are crucial steps in optimizing campaign performance. Brands that invest in proper tracking gain deeper insights into customer behavior, improve attribution accuracy, and enhance data-driven decision-making.
With EasyInsights, you can streamline conversion tracking, improve attribution, and activate data effectively to maximize ROAS.
To learn how EasyInsights can help you, book a demo today!