To get the best results from your Google Ads, tracking conversions is essential. Without it, you’re just guessing which ads are performing and which ones are wasting your money.
The good news is that setting up Google’s conversion tracking tag is now simpler, with flexible options to suit different setups.
In this guide, we’ll walk you through the steps to install the Google tag and make sure it’s working correctly.
Jump ahead to:
What is Conversion Tracking?
Conversions are the important actions people take on your website like buying a product, signing up for your newsletter, filling out a contact form, or downloading your app. These actions matter because they help your business grow.
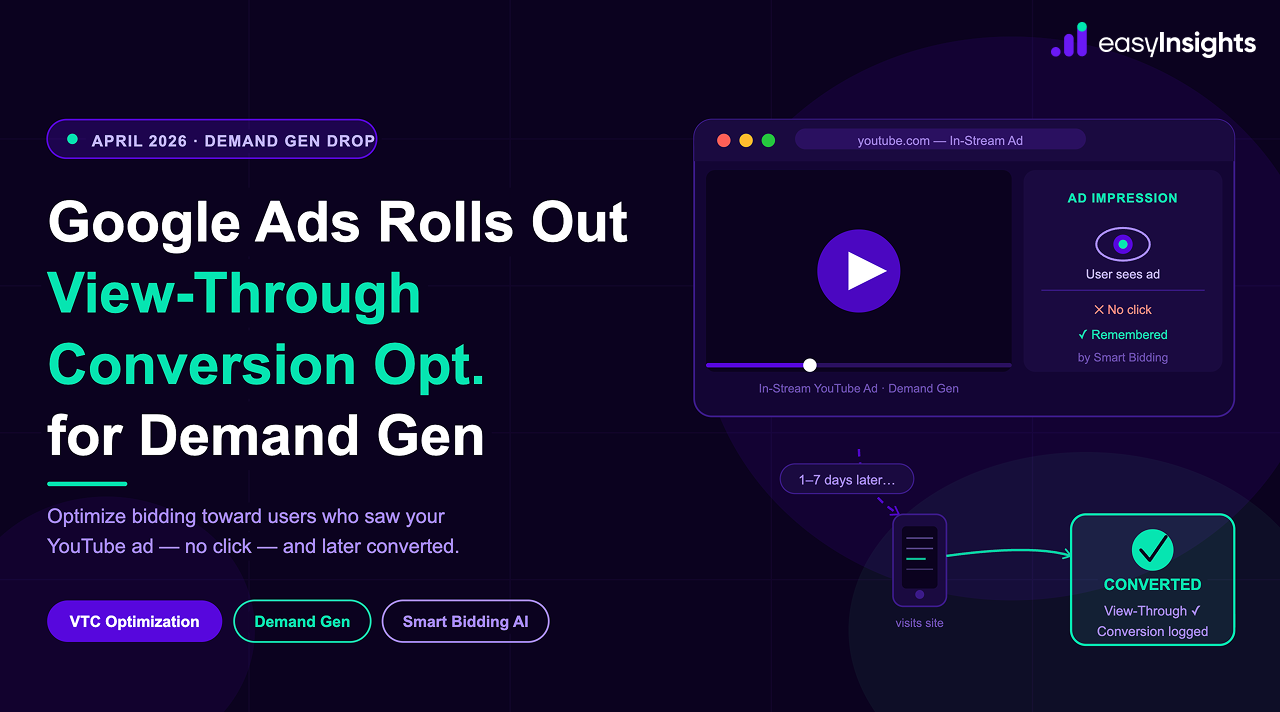
Conversion tracking is a way to measure these actions and understand where they’re coming from. For example, did a customer make a purchase after clicking on a Google ad, seeing a social media post, or visiting your website directly?
By using conversion tracking, you can see which marketing efforts are working best. This helps you spend your time and money on the channels that actually bring in results.
Why Are Conversion Actions Needed?
Conversion actions are crucial for understanding how well your ads are performing. They provide important data that helps you:
- Measure Ad Performance: Conversion actions allow you to track specific user behaviors on your website, like making a purchase, signing up for a newsletter, or completing a form. This helps you understand how effectively your ads are driving valuable actions.
- Optimize Campaigns: By analyzing conversion data, you can make better decisions about your campaigns. For example, you can identify which ads, keywords, or audience segments are performing the best, and adjust your strategy accordingly to improve results.
- Improve Targeting with Algorithms: Conversion actions help the algorithm learn which types of users are most likely to take the desired actions (like making a purchase). Over time, this allows the system to optimize your campaigns and find more of the customers who are most likely to convert.
Guide to Install the Google Tag
Step1: Create a conversion action
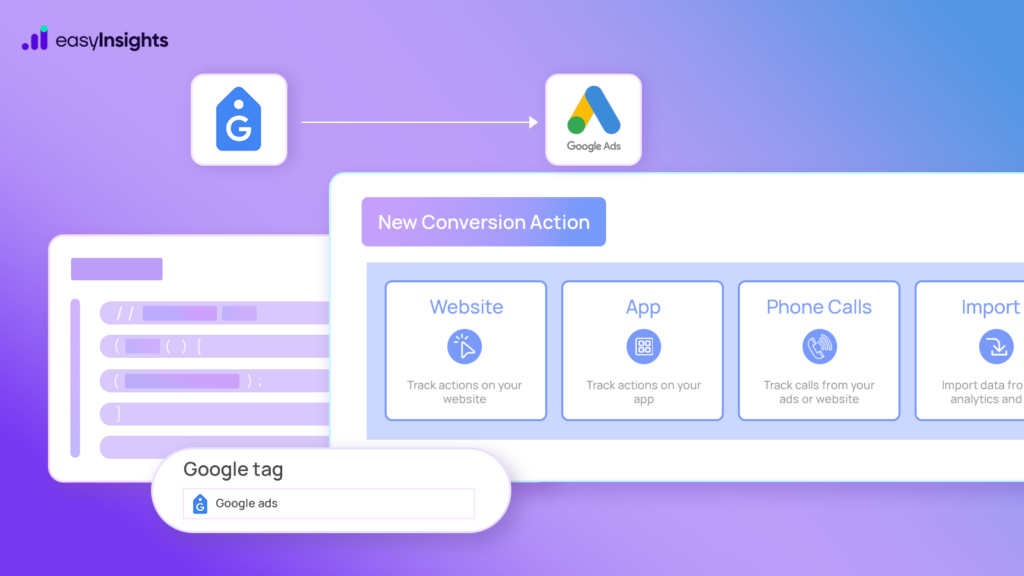
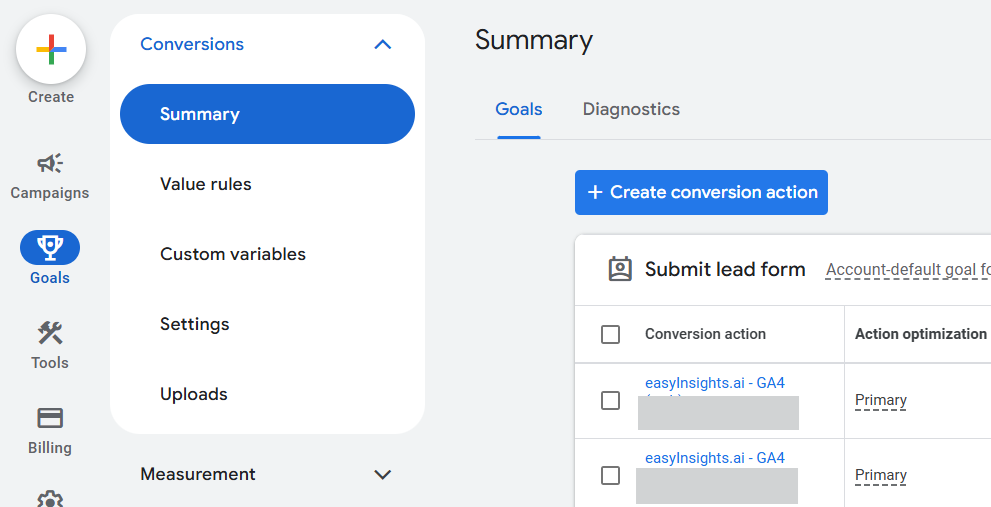
To set up a conversion action in your Google Ads account, go to Goals, then Conversions, and then Summary.
From there, select + Create conversion action to begin the setup process.
After clicking on Create conversion action in your Google Ads account, you’ll be asked to choose the type of conversion you want to track. This helps Google know where and how your conversions are happening. You can choose from the following categories:
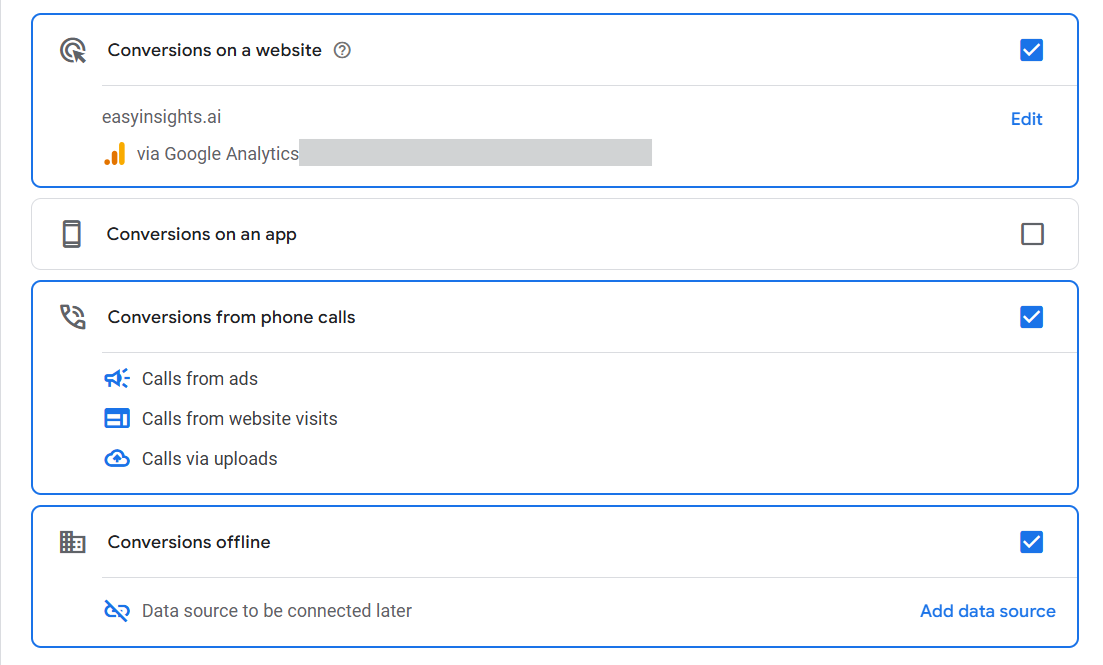
- Website Conversions – This option is for tracking actions that happen on your website, such as purchases, form submissions, newsletter signups, or any other important interaction.
- App Conversions – If you have a mobile app, this option allows you to track actions like app installs, in-app purchases, or any other activity within your app.
- Phone Call Conversions – This tracks calls made directly from your ads or website. You can measure how many people are calling your business after seeing your ad.
- Offline Conversions – Use this option if you want to track conversions that happen outside of your website or app, like in-store purchases or sales made over the phone that originated from an ad.
You can create conversion actions in Google Ads in two ways: by using existing Web and App events from Google Analytics or by setting them up manually.
If you go with the Google Analytics option, there’s no need to touch your website’s code – the setup is quick and easy.
However, if you choose to set up the conversion manually, you’ll need to add a special event code (called a snippet) to your website to track the action.
Step 2: Installing the Google tag
Setting up the Google tag involves three key steps:
- Install the Google tag
- Manually adding event snippets for conversion tracking
- Verifying the Google tag by using Google Tag Assistant
Install the Google tag.
In the Google ads interface click on tools, then Data manager. Then you will see an option of Google tag.
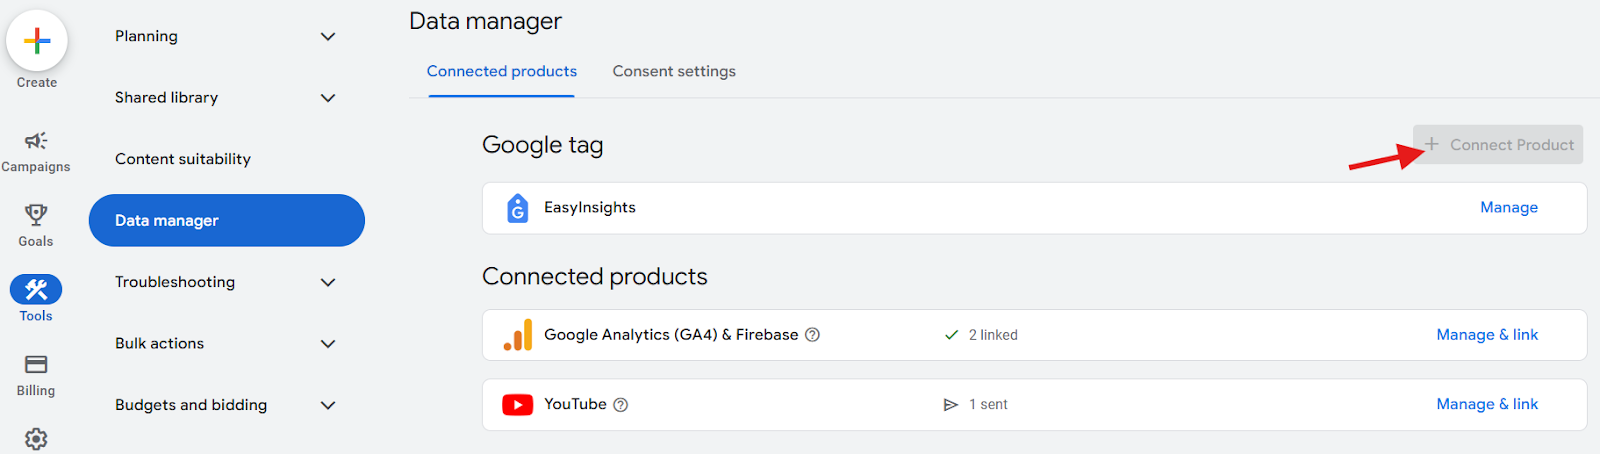
To begin installing the Google Tag, click on “+ Connect a Product.”
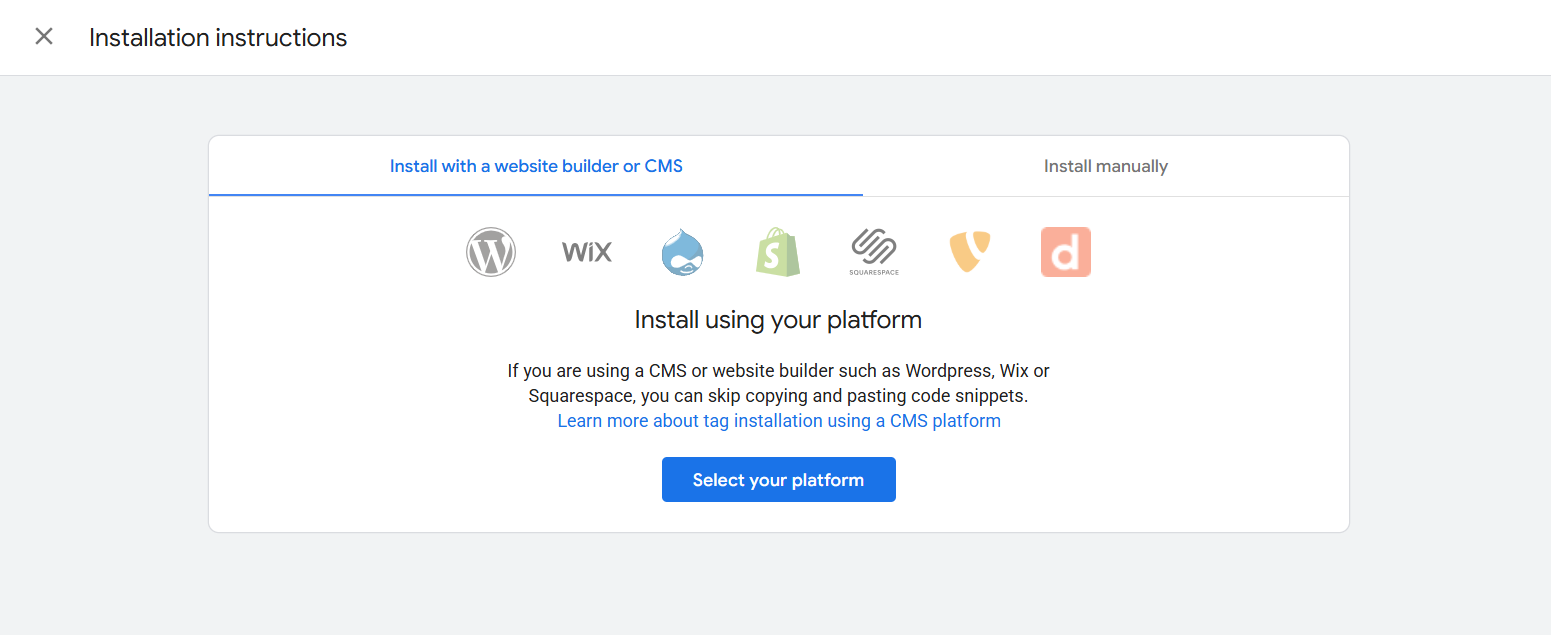
From there, choose one of the following installation methods:
- Use a website builder or CMS (like WordPress, Shopify, etc.)
- Install Manually (Manually add the tag code to your website’s HTML)
If you choose to install the tag manually, you’ll need to add the code snippet that appears on your screen after clicking Install manually.
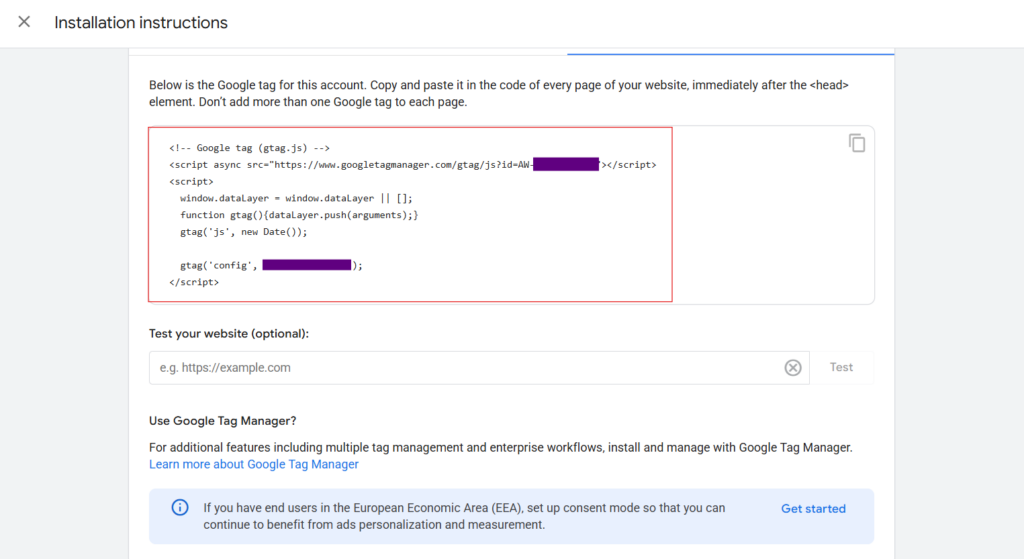
The displayed snippet code must be pasted into every page of your website, usually within the <head> section. If you’re tracking a button click, you’ll need to add the event snippet to the page where the button or link appears, and you may need to add additional code to trigger the conversion on click.
If you have the Google tag already installed on your website, you can skip the step of installing it again
Manually adding event snippets for conversion tracking
However, if you manually installed the Google Tag on your website, you’ll need to Follow this additional step to track conversions properly.
- In your Google Ads account, go to the Google Tag section.
- Click on “See event snippet” next to the conversion action you’re setting up.
Now you’ll choose how you want to track conversions:
- Page Load – Use this if the conversion happens after a user visits a specific page. Example: A customer reaches a thank you or order confirmation page after purchase or sign-up.
- Click – Use this if the conversion is triggered by a click on a specific element like: A button (“Buy Now”, “Submit”, “Sign Up”) or a link (“Download”, “Contact Us”)
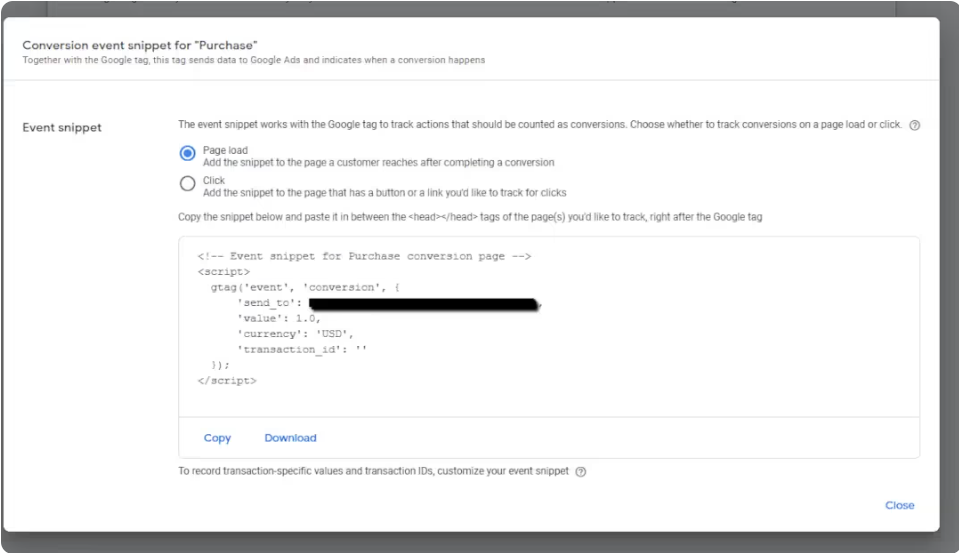
Once you’ve selected one, Google Ads will generate a matching event snippet.
Paste the event snippet within the head section of the conversion pages. This ensures that the conversion is recorded when someone completes the desired action. If the same conversion applies to multiple pages, make sure the snippet is included in each of those pages.
Verifying the Google tag by using Google Tag Assistant
Google Tag Assistant is a helpful tool for troubleshooting and ensuring your Google Ads tag is correctly installed on your website. It’s an essential tool for confirming that your tracking, conversion, or remarketing tags are firing properly. Here’s how you can use it within Google Ads:
- Navigate to Google Tag section → Go to Admin section → Launch Tag Assistant.
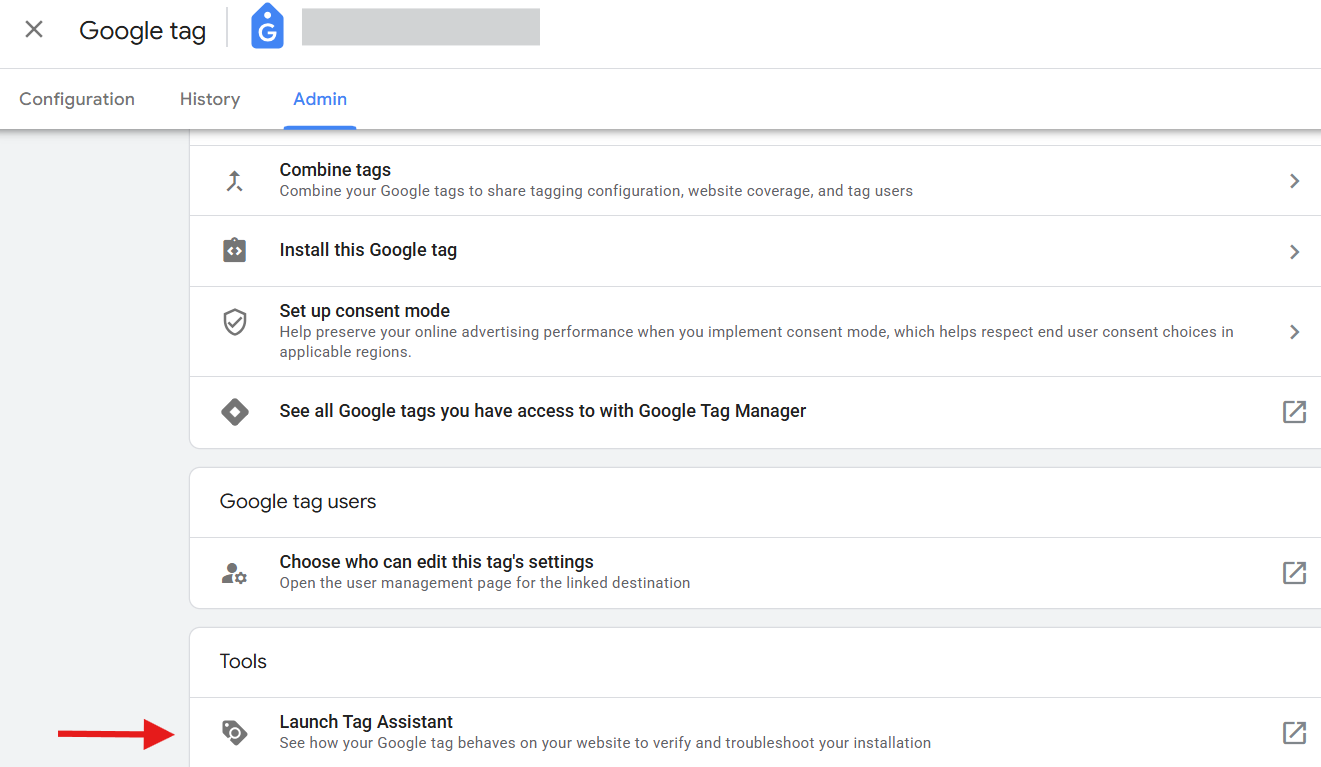
- Click on ‘Launch Tag Assistant‘; a new tab will open with the Tag Assistant tool.
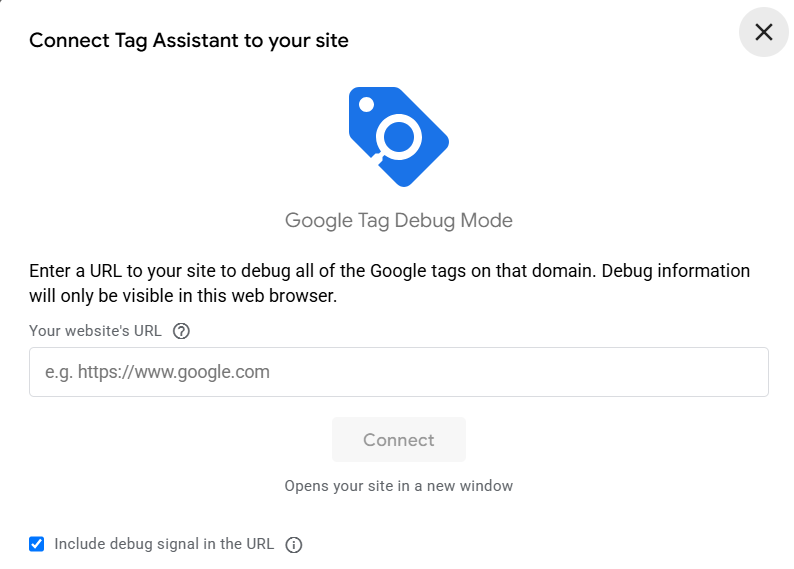
- Enter your website URL and then click on Connect
Once the Tag Assistant connects to your site, it will start analyzing the tags and displaying its results in real time. The results will tell you whether:
- The tag is firing correctly.
- There are errors or warnings that need your attention.
- Missing tags or incorrect configurations are detected.
If everything is working correctly, Tag Assistant will display a message like “Tag installed and firing successfully.” If there’s an issue, it will give you specific suggestions to fix the problem.
Example (“Tag missing on page” or “Page load delay detected”).
You can repeat the process for any other tags you have implemented on your site. This ensures that your site is properly tracking all the necessary actions for your advertising campaigns.
Conclusion
Implementing conversion tracking with the Google Tag is a crucial step in understanding how users interact with your website and which campaigns are truly driving results. By setting up the right conversion actions, installing the tag properly, and verifying its functionality through tools like Tag Assistant, you’re laying the foundation for accurate performance measurement.
Enhance your conversions with EasyInsights
Google Ads Enhanced Conversions are a game-changer for marketers aiming to track performance more accurately. EasyInsights helps enhance conversions by leveraging first-party data – such as email addresses or phone numbers collected during a conversion which Google can match to signed-in users, filling the gaps left by browser restrictions, cookie limitations, or cross-domain tracking issues.
How EasyInsights Enhanced your Conversions
- Accurate First-Party Data Capture
- Seamless Integration with Google Ads
- Real-Time Tracking Validation
- Cross-Channel Attribution
- Server-side Tracking
To Know more, Book a demo today!
Additional read – How To Set Up Conversion Tracking in Google Ads for Shopify: A Complete Overview