Guide: Step by Step
Step 1: Sign in to Google Ads
- Go to ads.google.com and log in with your account
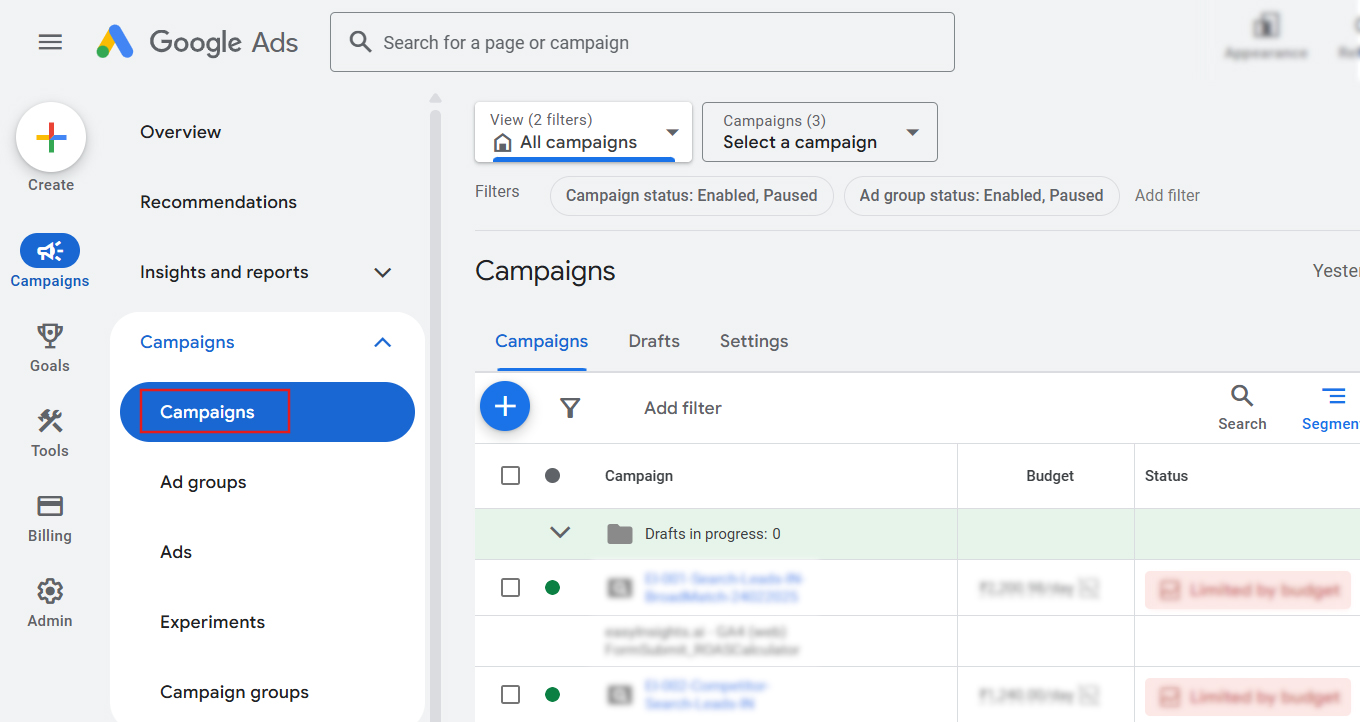
Step 2: Navigate to Campaigns
- Click on “Campaigns” from the left-hand navigation panel
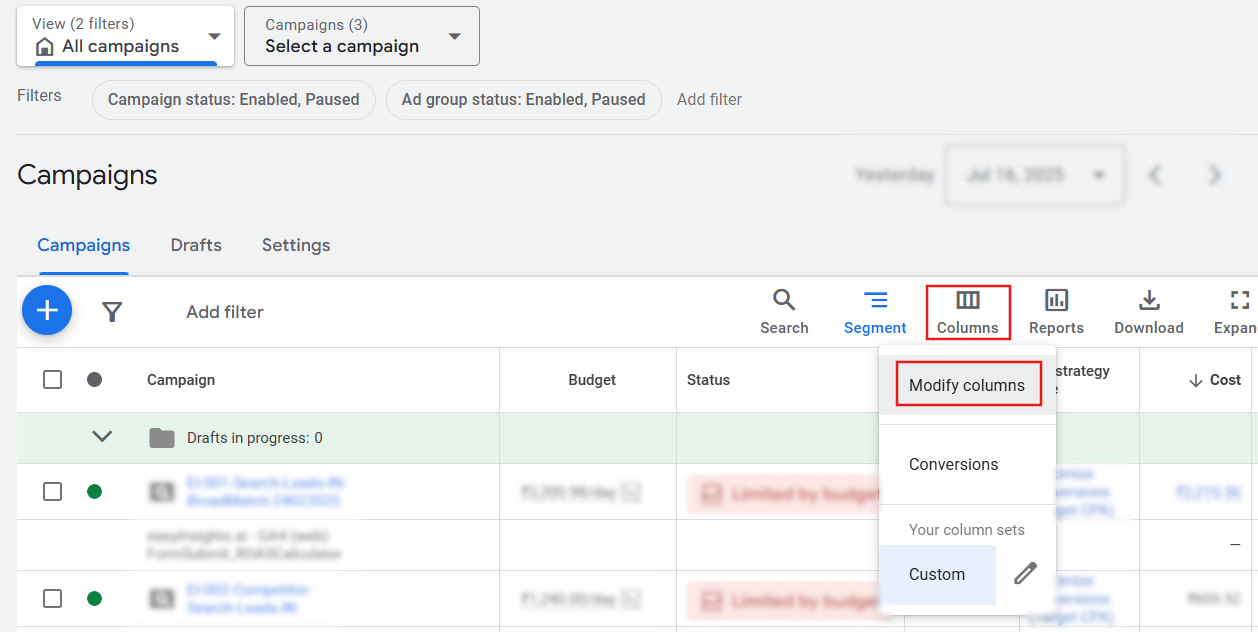
Step 3: Click on Columns → Modify Columns
- At the top right of the table, click on the “Columns” icon (three vertical bars).
- Then select “Modify columns” from the dropdown.
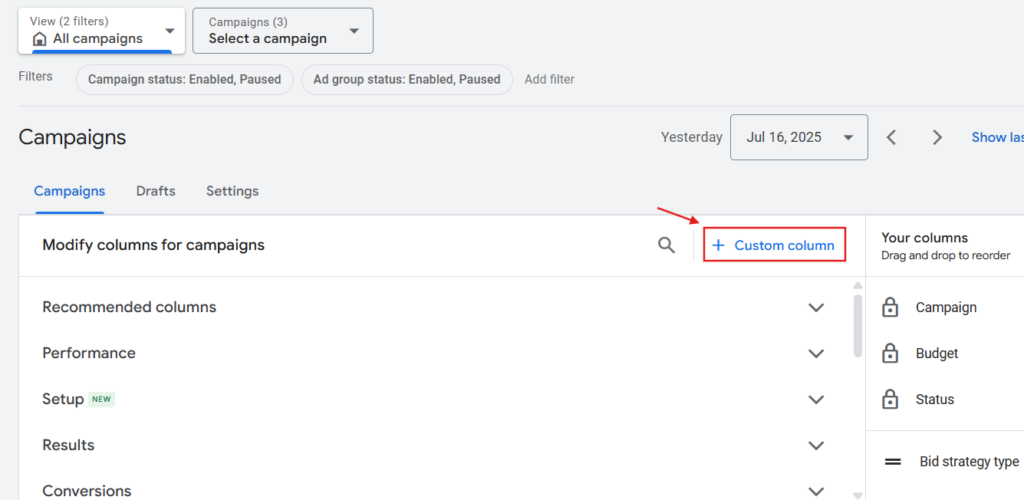
Step 4: Click on “Custom Columns”
- In the left sidebar of the Modify Columns window, scroll down and click “Custom columns.”
- Then, click the “+ Custom column” button
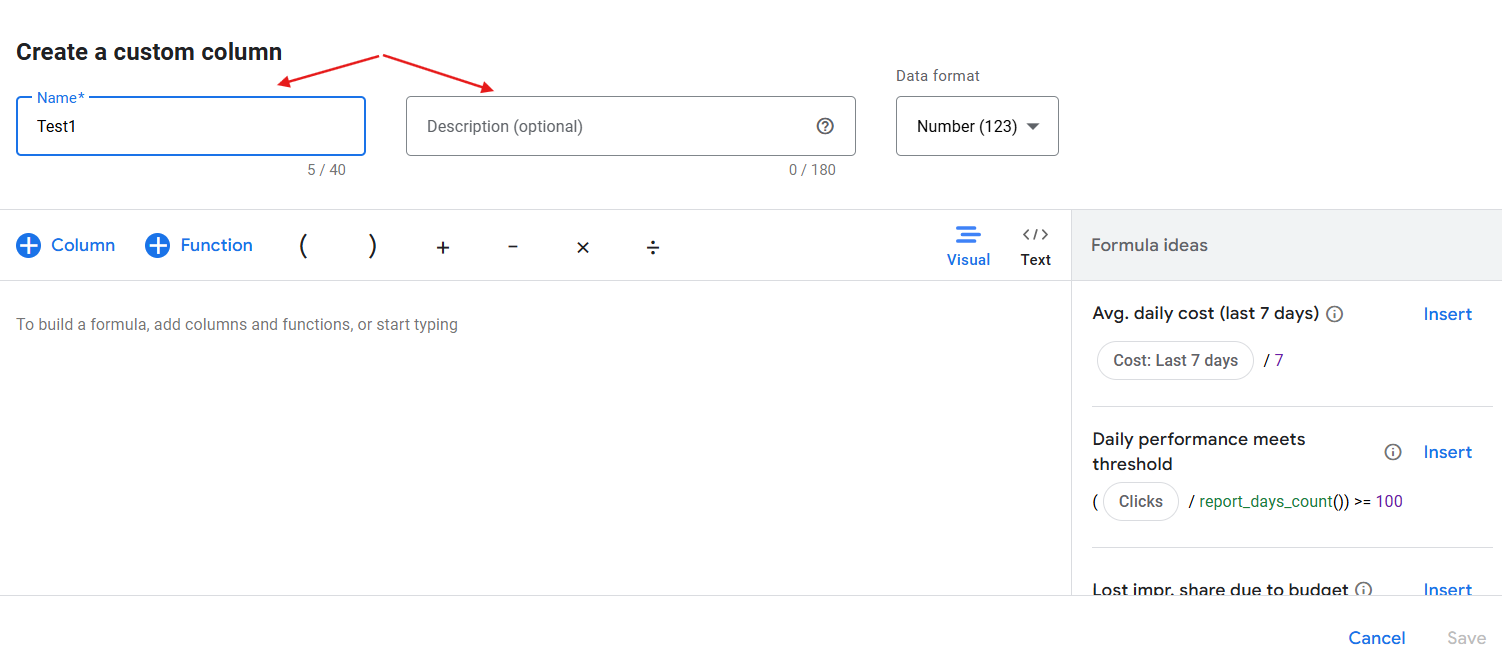
Step 5: Set Up Your Custom Column
You’ll now see a form where you need to define your custom column:
- Name: Give your custom column a clear, meaningful name
- Description (optional): Add a description to explain what this column does — helpful for other team members.
- Click on
 icon
icon
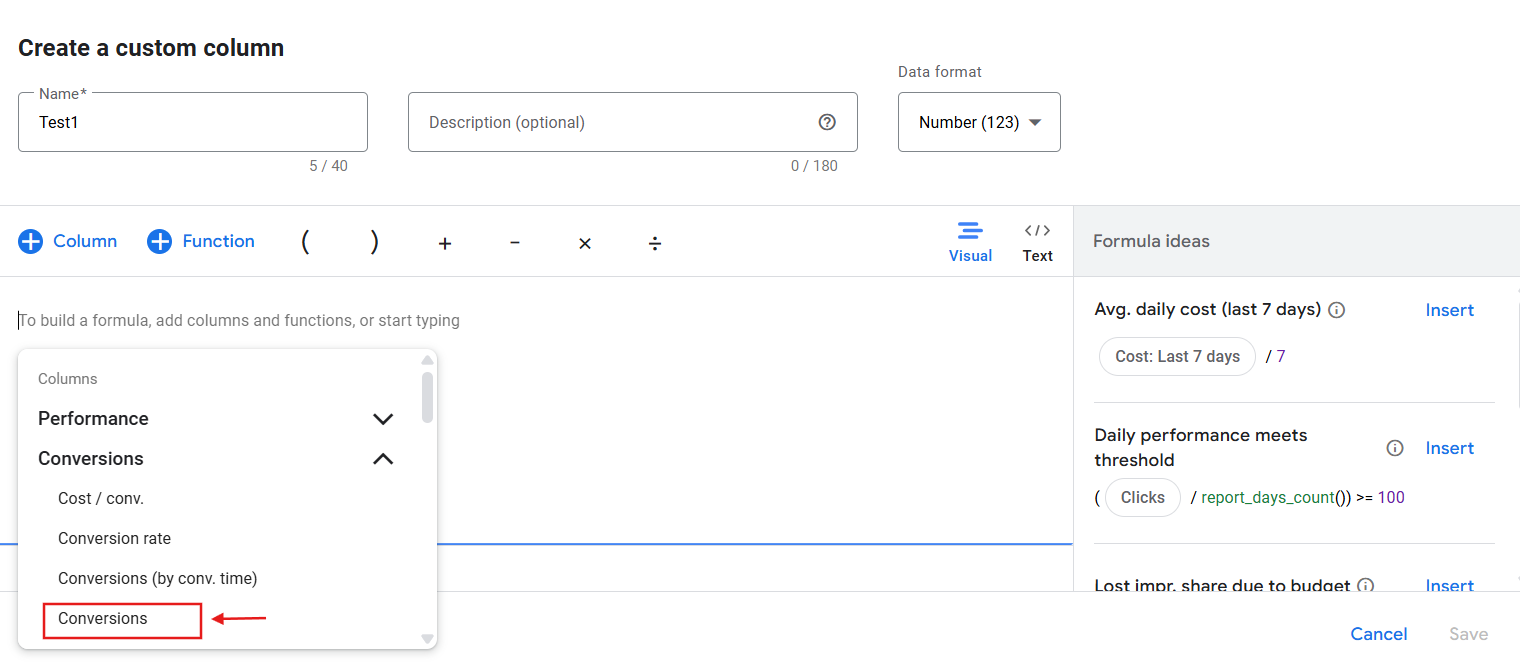
Step 6: Select your conversions
- Select the conversion from the columns as shown
- Select your conversion action category
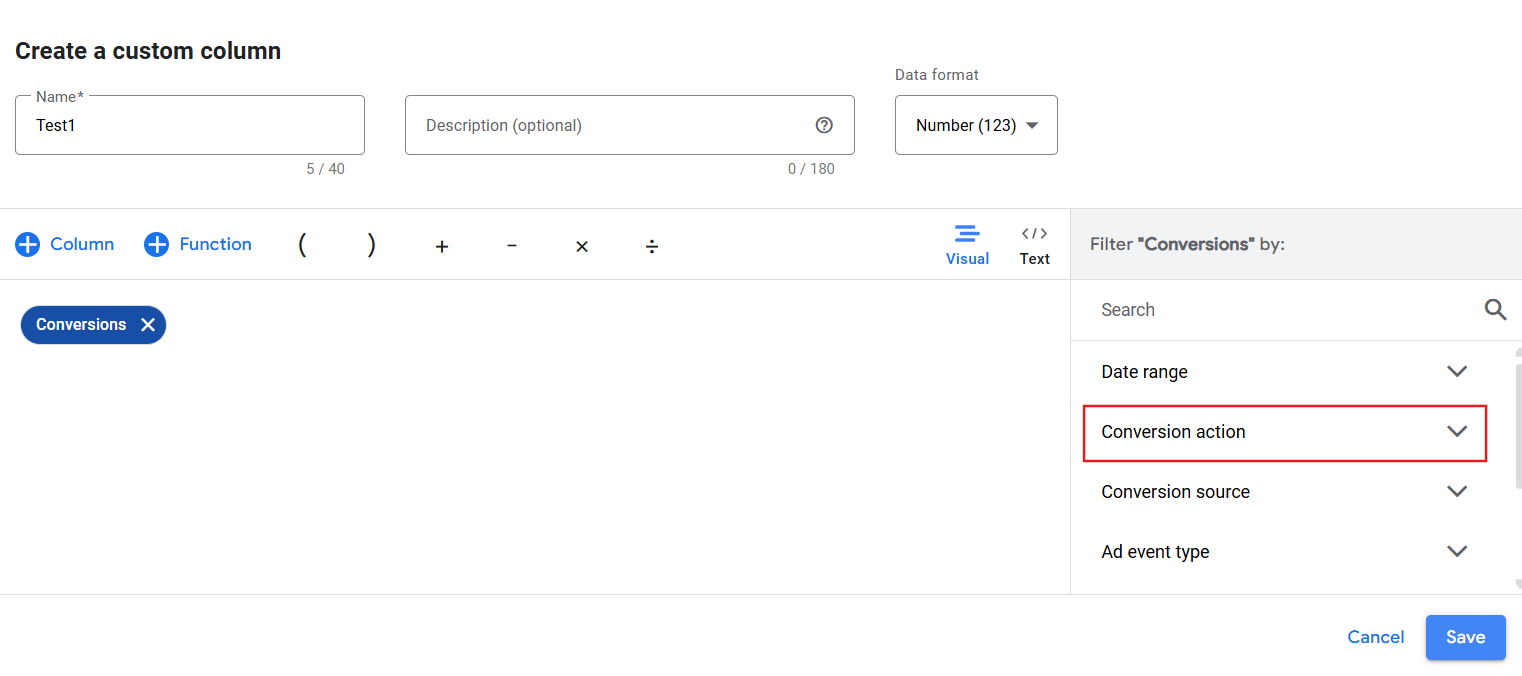
- Click on save


