When it comes to paid ad promotion, it is important to identify what makes the difference and what leads to a spending hole. Without insight, you risk throwing away your money instead of investing in what will benefit you in the long run.
For many brands, every dollar invested in Google Ads needs to come back multiplied in tangible returns. To make that happen, it is crucial to have correct conversion tracking for your Shopify store in Google Ads.
In this guide, I’ll explain to you two easy steps to set up Google Ads conversion tracking for your Shopify store, and what to do if something goes wrong, with a few tips on what to do with all that data. Let’s explore!
Jump ahead to:
How to set up conversion tracking in Google Ads for Shopify?
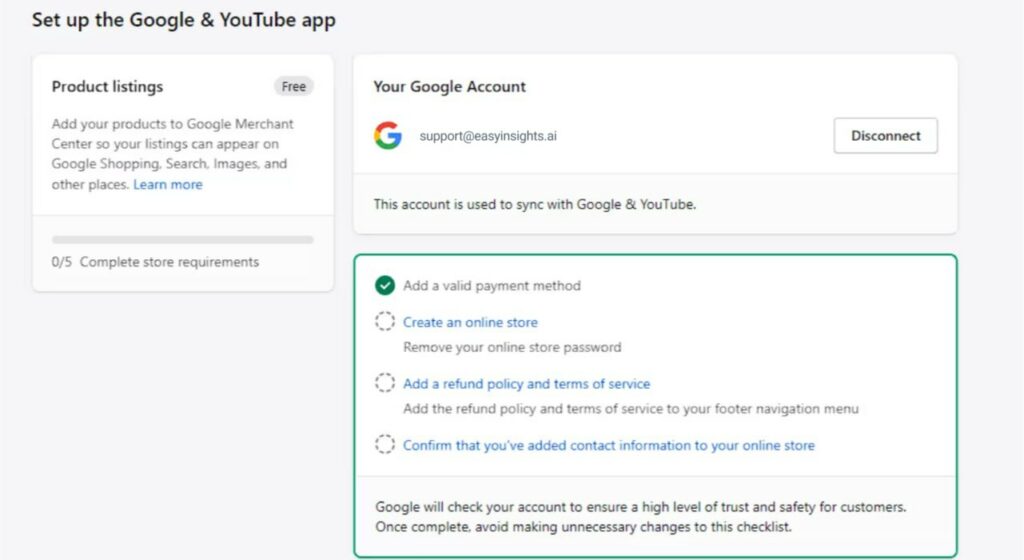
There are some store requirements before setting up Shopify’s conversion tracking on Google Ads.
Store requirements : To use the Google & YouTube channel, you need to make sure that your online store meets the Google Merchant Center requirements:
- You need a Shopify online store, and your store can’t be password-protected.
- You need to add a valid payment provider in your Shopify admin.
- You need to add a Refund Policy and Terms of Service to your online store. Learn more about adding your store policies to Shopify. These policies must be available in your footer navigation menu. If you haven’t added your store policies to the footer navigation menu, then click Add the Refund Policy and terms of Service to your footer navigation menu in the setup checklist.
- You need to add your contact information to a page in your online store, and the information needs to be visible to customers. You need to include at least one contact method such as email address, phone number, mailing address, or a contact form. Learn more about adding your contact information.
- You need to ship to one of the supported countries, and you need to sell in a currency that matches the country.
Method 1: Tracking using Google and YouTube Apps
This by far is the easiest and most effective way of creating Google Ads conversion tracking. It is very easy because, via Google & YouTube apps located in Shopify’s app store, you can link your Google Ads account inside Shopify within a few minutes. However, there are a few prerequisites you’ll need to ensure are in place before proceeding:
1. Linked Google Ads Account: Make sure you set up your Google Ads account about your Shopify store through the use of the Google & YouTube app.
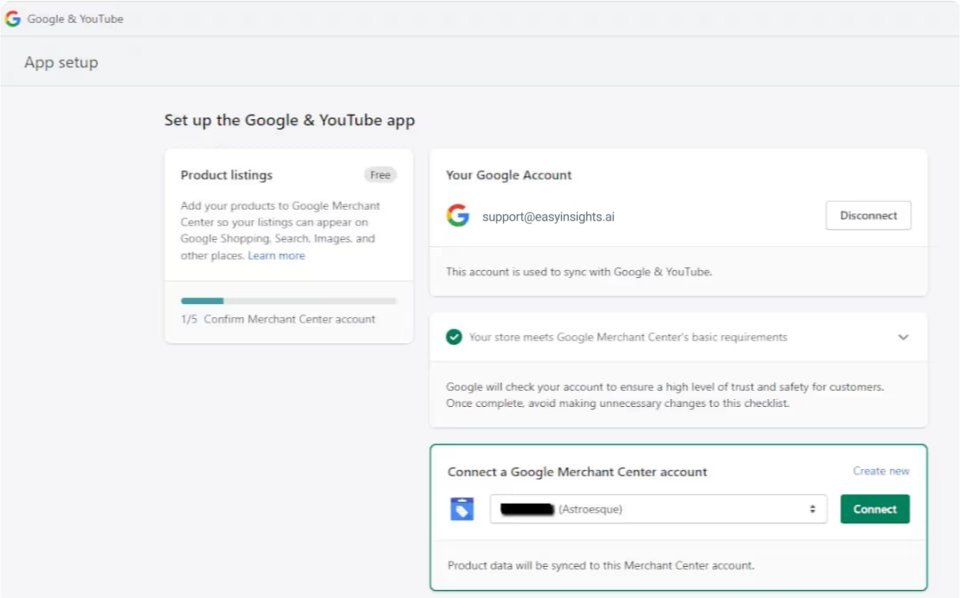
2. Verified Google Merchant Center: For product-based advertising, it is crucial for your Shopify store to be connected with a verified Google Merchant Centre account.
3. Admin Access: The setup requires admin privileges to the Shopify store, as well as the Google Ads, account to be done to reflect the changes made.
4. Google Tag Implementation: The Google & YouTube app will apply the conversion tag for Google Ads automatically for you. Remember you must provide appropriate permissions that would enable this integration to take place.
5. Enable Enhanced Conversion Tracking: At the settings of the Google & YouTube app, one should set the tracking of enhanced conversions so that features capture better data.
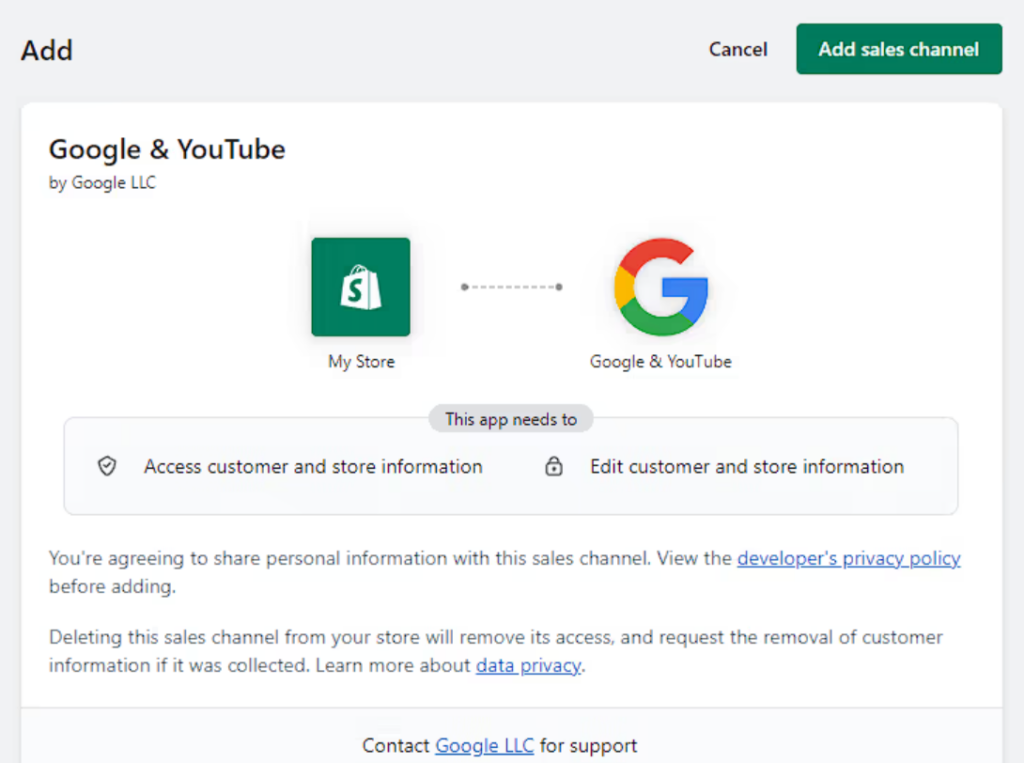
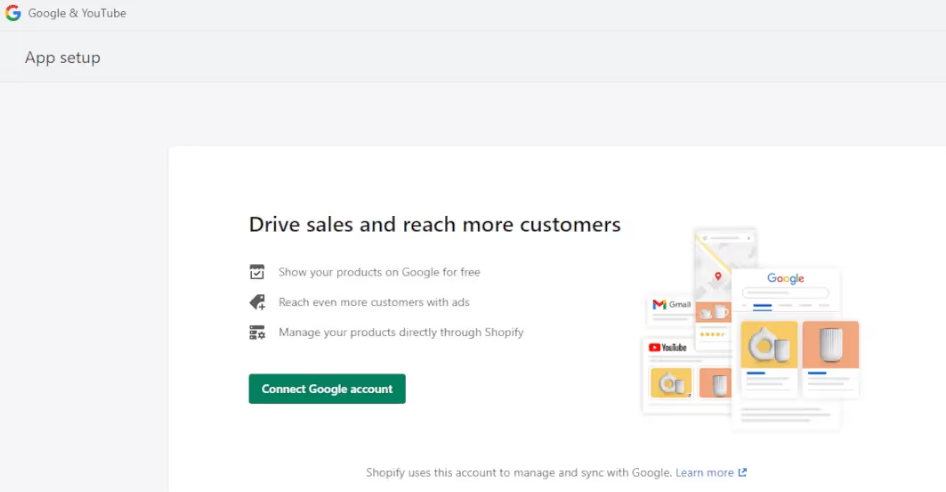
- Next, you’ll need to link your Google account to Shopify. Select the ‘Connect Google account’ button on the next screen.
- On the popup, select the Google account you want to connect to and click ‘Next.’
- If you haven’t finished all the requirements to connect the two, you’ll see a checkbox on the next page listing the steps you need to take before completing the setup.
- After this, you should link your Google Merchant Account, which you created earlier. If you have connected the GMA account and the Google account you signed in earlier with the same email, it will be filled in with your GMA. Click ‘Connect’ on this page so that you can proceed and establish the connection between the two.
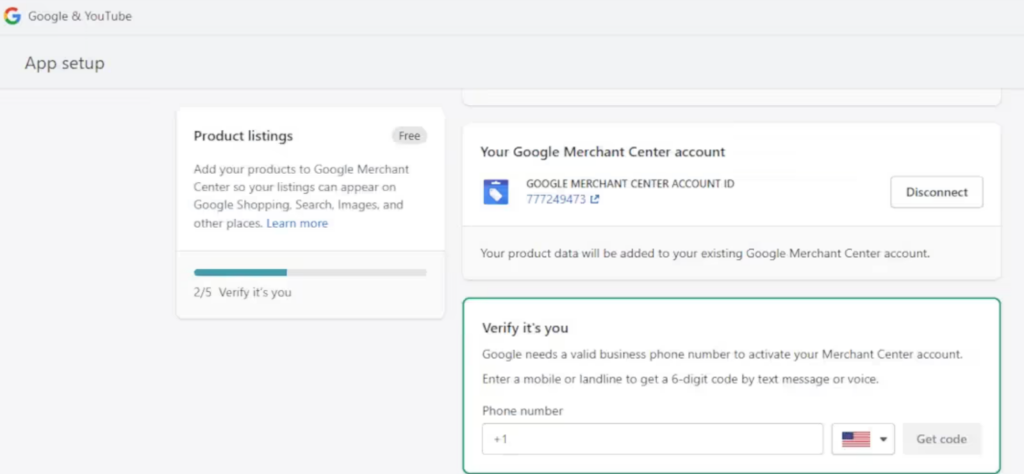
- Google will then need to verify your identity via phone. Add in your phone number and the code you receive to complete the process.
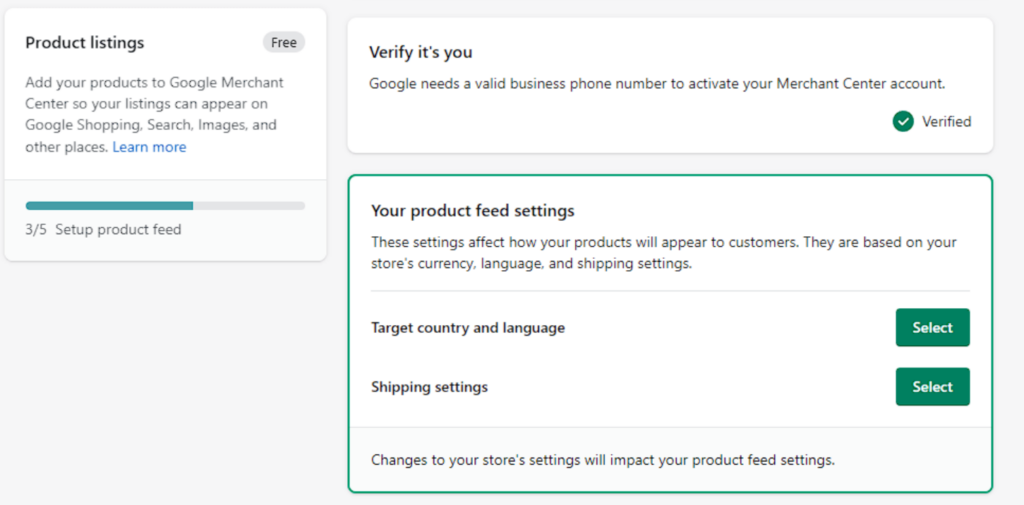
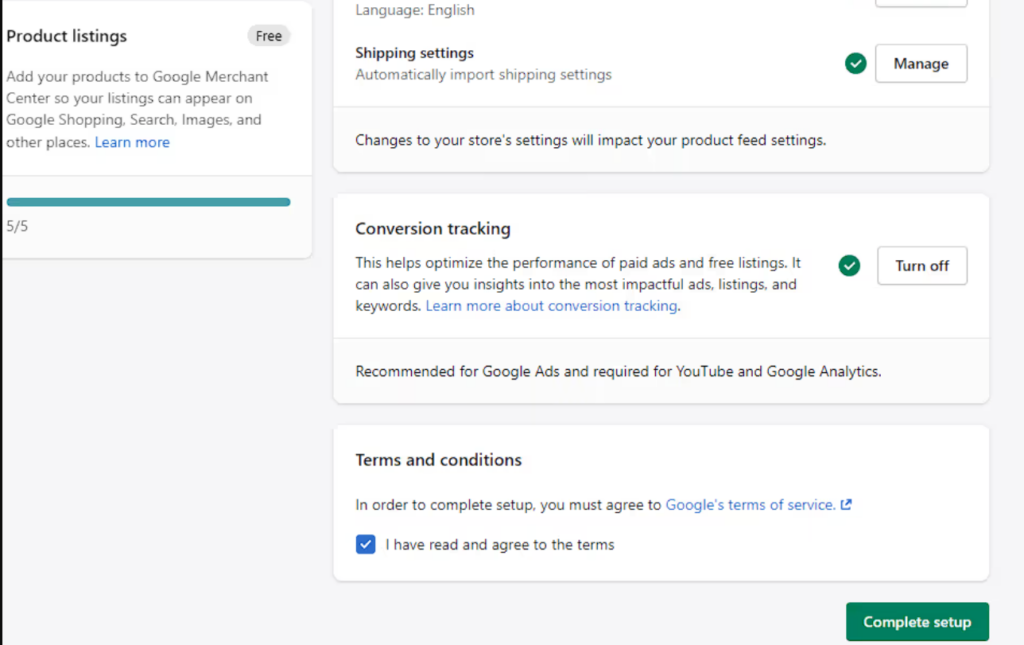
- In the next step, we need to add our product feed settings so Google can show our products in Google Search, Shopping, and Images. Simply add your shipping locations and shipping settings using the boxes below.
- Finally, accept the terms and conditions and complete your setup!
Method 2: Manual conversion tracking for Shopify in Google Ads
Manual conversion tracking installation means simply pasting a Google Ads conversion code into the Shopify theme. This method is flexible and provides detailed control but at some expense to technical skills.
Creating a Conversion in Google Ads
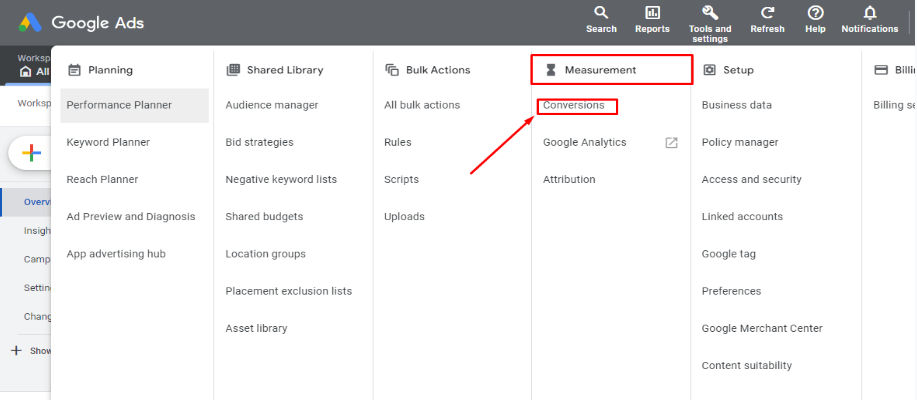
Access the Conversion Tracking Settings:
- Log in to your Google Ads account.
- Go to Tools & Settings > Conversion tracking.
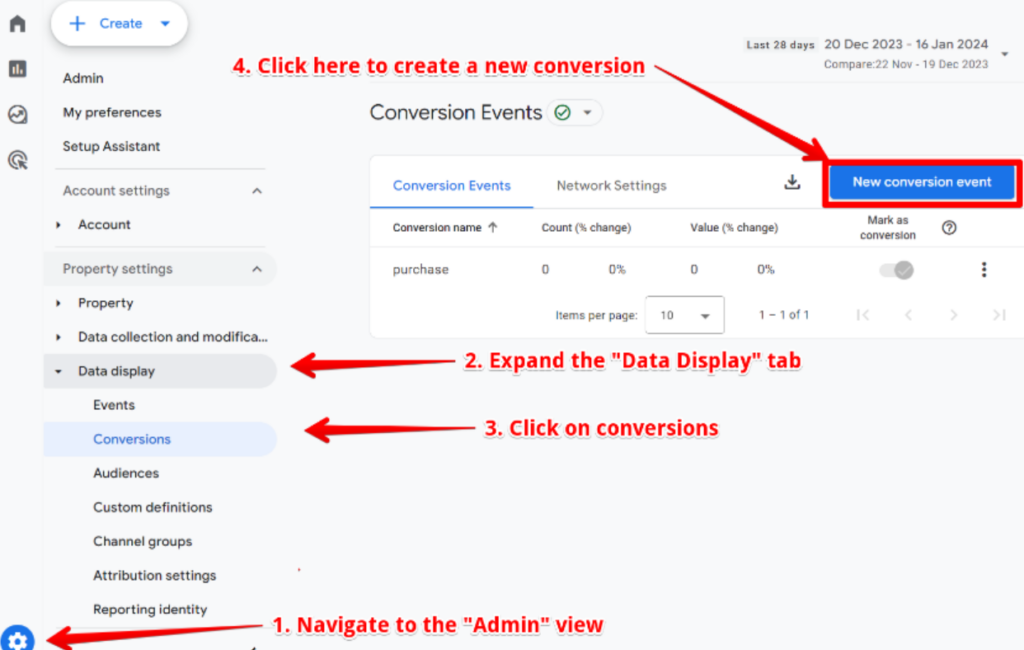
Create a New Conversion:
- Click the + button to create a new conversion.
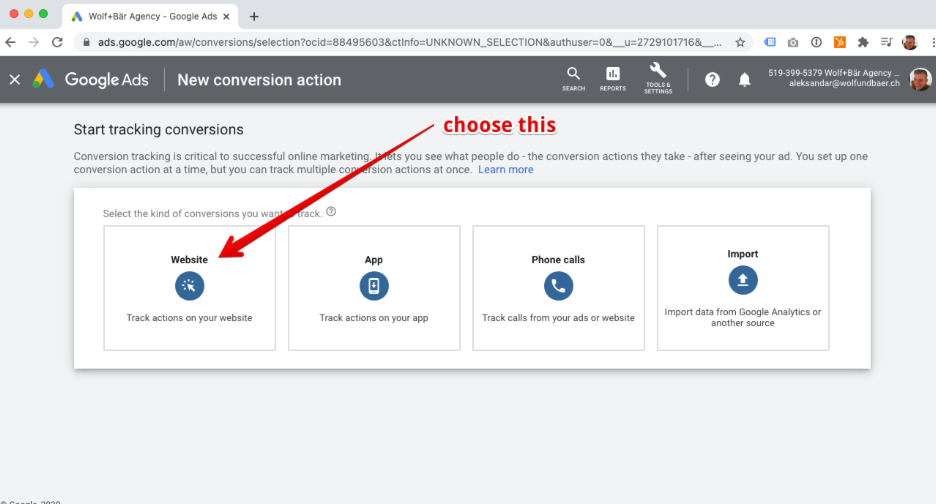
Choose Conversion Type:
- Select Website as the conversion action.
Provide Conversion Details:
- Give your conversion a clear and descriptive name (e.g., “Shopify Purchase”).
- Choose the appropriate Category (e.g., “Purchase”).
- Set the Value (e.g., fixed value or from Google Analytics data).
Select Conversion Method:
- Choose the method that suits your Shopify setup (e.g., manual, Tag Assistant, Google Tag Manager).
Get the Conversion Code:
- Google Ads will provide you with a conversion code. Copy this code.
Add the Code to Your Shopify Store:
- Follow the instructions in the previous responses to add the code to your Shopify theme (either manually or using Tag Manager).
Verify Conversion Tracking:
- Create a test conversion to ensure it’s recorded correctly in your Google Ads account.
Add Google Tag to Shopify
- On the final page of the setup, Google will present the option to either install the tag manually or automatically. Select the ‘Install manually’ option and copy the code to your clipboard.
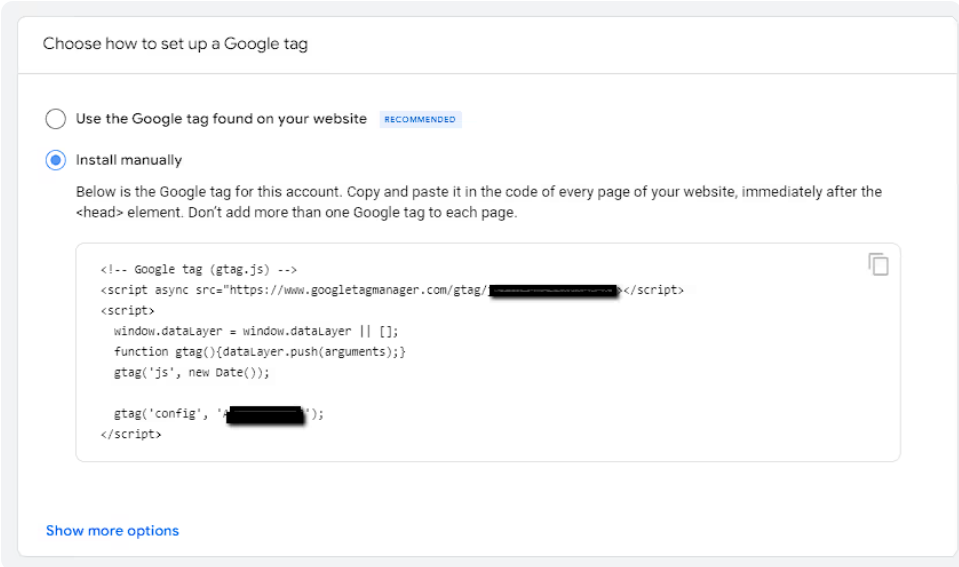
- In another browser window, open your Shopify admin and click ‘Online Store.’
- Click the … button > ‘Edit code.’
- Open your theme. liquid file. If this is the first time you’ve installed a global site tag, paste the copied global site tag between the <head> and </head> tags to apply the tag to every page in your store. If you’re editing a global site tag that you’ve already installed, locate the global site tag in your theme. liquid file and change the code as suggested by Google Ads.
- Click ‘Save.’
Add the event snippet to Shopify
This step can be a bit challenging because you need to modify the code from Google before adding it to Shopify.
- Go back to the conversion action you created earlier, select the ‘Page load’ option, and then copy the code snippet.
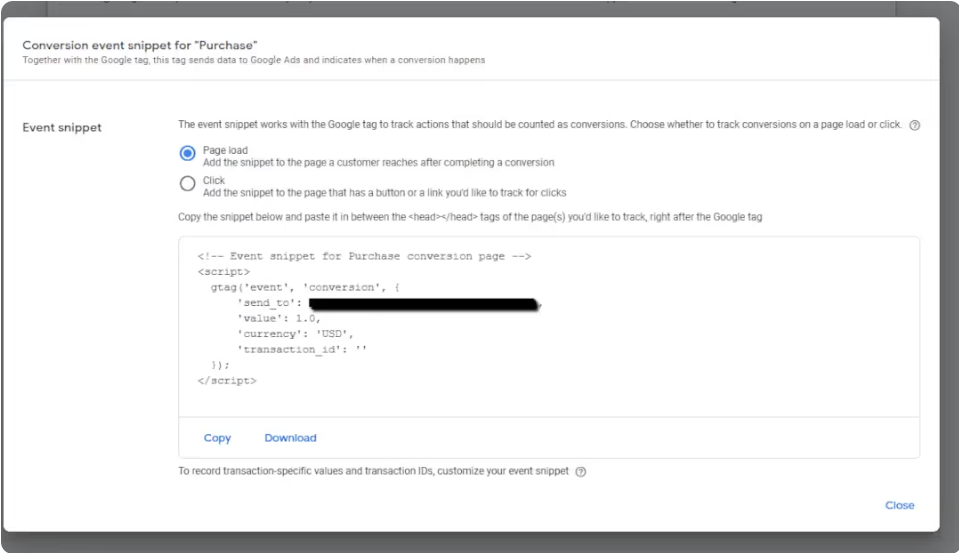
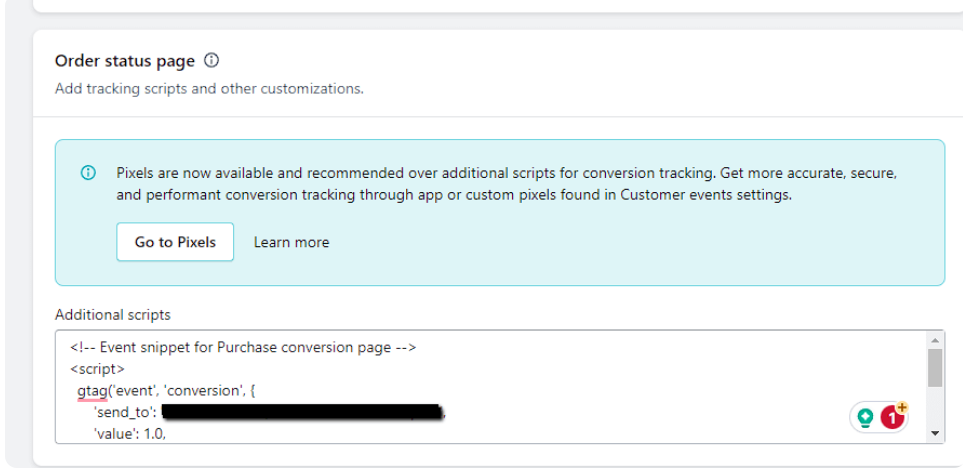
- In a separate browser window, open your Shopify admin and go to Settings > Checkout. In the Additional Scripts text box, paste the event snippet. If there’s already code in the text box, simply add the event snippet on a new line below the existing code.
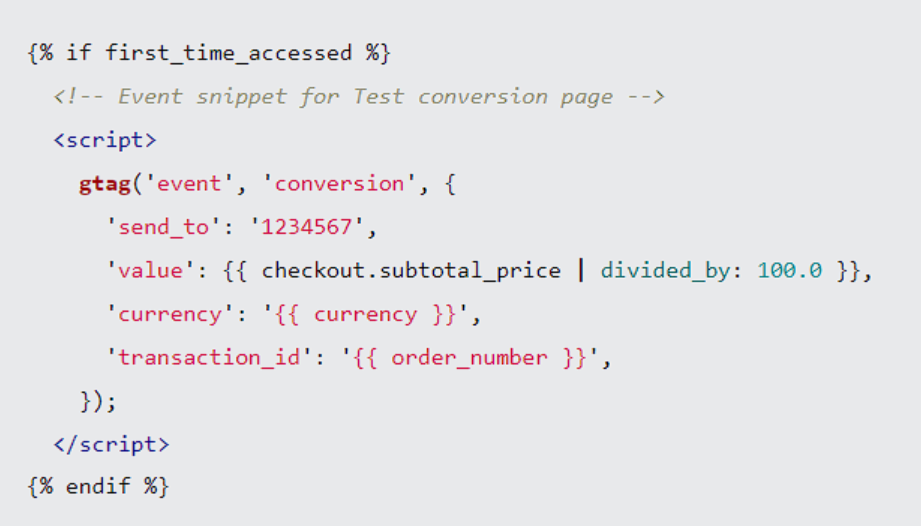
To avoid recording duplicate conversions if a customer reloads the checkout page, add the following tags before and after the event snippet, so it only triggers once per customer:
- Before the event snippet, paste:
{% if first_time_accessed %} - After the event snippet, paste:
{% endif %}
If your store’s default currency is not USD, replace ‘USD’ in the event snippet with {{ currency }}.
For the transaction ID, to prevent Google Ads from counting duplicate conversions, change the ‘transaction_id’: ” to ‘transaction_id’: ‘{{ order_number }}’.
Click Save.
If your store sells items with different prices, you’ll need to edit the value section of the code.
- To exclude taxes and shipping from the conversion amount, replace ‘value’: with:
‘value’: {{ checkout.subtotal_price | divided_by: 100.0 }}, - To include taxes and shipping, replace it with:
‘value’: {{ checkout.total_price | divided_by: 100.0 }},
By the end of these steps, your code should look something like this (with your Google code instead of ‘1234567’):
- Since the example above only covers purchase conversions, you’ll need to go back and set up conversion actions for other steps in the funnel, such as ‘Add to Cart’ and ‘Initiate Checkout.
How to verify the Google Ads Conversion Tracking
However, after installing Google Ads conversion tracking to your Shopify store, several steps need to be taken to ensure that this conversion tracking is working properly. Good tracking also makes sure that you are collecting data that will help your campaigns and know your return on investment. Here’s how you can verify the setup:
Google Ads Interface: Go to your Google Ads account. On the left account’s columns, go to the “Tools & Settings” tab, and find “Conversions” under the Measurement sub-tab.
You’ll also want to see the status of the new conversion action you just created. If everything is done properly, you are supposed to be switched to “Recording Conversions” within a couple of times after a couple of conversion events have occurred.
Google Tag Assistant: Check that the conversion tracking code is firing properly on your Shopify store by using Google Tag Assistant. It’s simple, you install this Chrome extension and then go to the page that causes a conversion (like the “Thank You” page after a purchase) and look for the conversion tag.
Test Conversion: ’Test buy’ or accomplish a major goal in your store, maybe sign up for a newsletter or purchase Shopify. After acting, check your Google Ads account to ensure that the conversion was recorded. It takes some hours to come up.
Conclusion
To activate conversion tracking you will have to create the conversion actions in Google Ads that should correspond to the goals you want to achieve (for example, purchases, and registrations). Next, you’ll have to manually install the Google Ads conversion code on your Shopify store, or through Google Tag Manager. After putting the code into your site, you can confirm that your conversion tracking is on track and proceed to analysis.
By adopting and implementing these recommendations based on conversion tracking you are bound to generate higher conversions, better ROI, and fully realize your business goals set for Shopify.
Additional Reading: Shopify Metaobjects – All You Need to Know
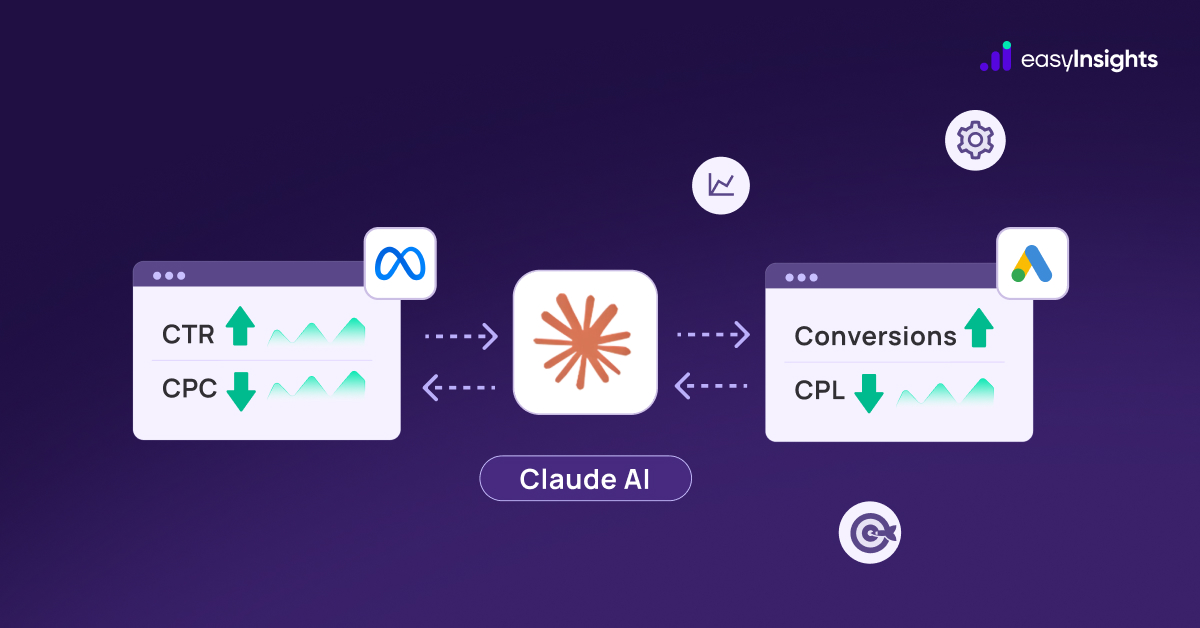
Bonus Read: How EasyInsights works with First-Party Marketing Data for Data Activation and Enrichment
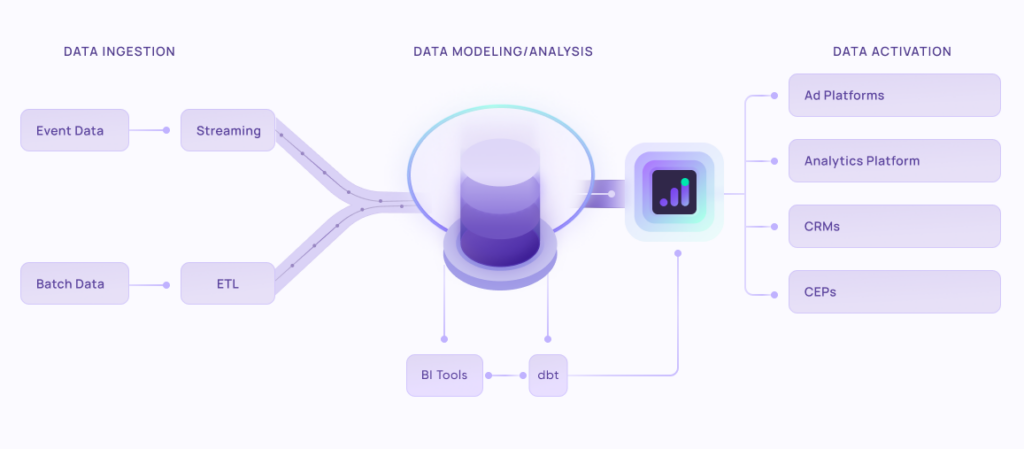
EasyInsights works with raw marketing data for data activation and data enrichment in a few key ways:
Data Collection and Transformation:
- EasyInsights connect directly to your martech data allowing it to access and extract the raw first-party data you’ve collected.
- Data Transformation: EasyInsights then cleans, normalizes, and enriches the data to make it usable for activation purposes. This may involve tasks like:
- Formatting data: Ensuring all data points are in a consistent format.
- Handling missing values: Filling in missing data points or removing them according to your preferences.
- Enriching data: Adding additional data points from other sources to create a more comprehensive picture of your customers.
Data Activation:
- Segmentation and Targeting: It allows you to segment your audience based on various criteria like demographics, behavior, and interests using the enriched data.
- Multi-channel Marketing: You can then use these segments to activate your audience across different marketing channels like email, social media, and advertising platforms.
- Customer Relationship Management (CRM): The data can be used to personalize outreach and interactions with customers within your CRM system.
- Marketing Attribution: EasyInsights can help you understand how different marketing channels contribute to conversions and optimize your marketing spend accordingly.
Key Feature:
- Offers features like customer data platform (CDP) capabilities, marketing automation, and campaign management tools.
- Focuses on reverse ETL (extracting data from your warehouse and sending it to marketing tools) and offers pre-built integrations with various marketing platforms.
EasyInsights is a marketer’s preferred tool for first party data activation.
In this age of cross-channel marketing, EasyInsights offers a comprehensive platform to collect, store, and transform all your first-party data.
EasyInsights enhances marketing campaign efficiency in a cookieless landscape with accurate ad signals. It helps brands step away from surface-level metrics and unleash the potential of first-party data to optimize marketing strategies, ensuring a superior Return on Ad Spend (ROAS). It does all this, while being a highly affordable no-code platform with an exceptional customer support apparatus.
Sign up for a demo today to see EasyInsights in action.