Button click tracking is a valuable way to gather data every time a significant button on your website is clicked. This guide will take you through the process of setting up GA4 button click tracking with GTM.
Tracking button clicks is a crucial component of establishing a Google Analytics measurement ecosystem. While GA4’s built-in enhanced measurement events can track many interactions, button clicks typically require a custom event.
Jump ahead to:
Why Should You Be Tracking Button Clicks?
There are at least two compelling reasons for tracking button clicks –
- Firstly, it helps you understand where visitors are clicking on the site, which may reveal areas where they are confused or trying to interact with non-clickable elements like images. This data can also assist in configuring internal links to enhance user experience.
- Secondly, tracking button clicks can measure how visitors engage with significant buttons that correspond to your conversion actions.
In this blog, we will focus on how to set up button click tracking on the website, when users click on the YouTube subscribe button for a channel
Is button click tracking an automatic feature in GA4?
GA4 tracks button clicks for clicks on outbound links and file downloads. The tracking is enabled via enhanced measurement events. However, when it comes to tracking button clicks that lead to another page on your domain or those that do not have a link destination, there is no built-in solution in GA4.
For this purpose, you will need the Google Tag Manager to create a GA4 custom event tag.
Why is Tag Manager Required to Track Button Clicks in GA4?
Many custom events in GA4 can be created without the assistance of Google Tag Manager. However, in order to track button click events, creating a GA4 event tag is typically required. You have to create an event in GTM, and pair it with its pertinent trigger
Following are the steps involved in the process –
Steps to enable Button Click Tracking –
- Ensure the Google Tag Manager Container code is installed on your website, and the GA4 Configuration Tag is up and active.
- Configure the built-in click variables
- Now you have to create the button click trigger wherein you specify the user actions/conditions you wish to track. The way you set up the trigger will depend on the specific button and your site’s setup. Herein, we will use a link click trigger (that uses the destination URL of the button click). We can also use an all clicks element trigger (that uses click classes of the button you want to track).
- Now, create a GA4 event tag with an event name that will show up in your GA4 reports.
- If you want to send additional data with your button click event, you can set one or more event parameters. Here, we will send in the click text of the button that you’re tracking.
- Pair the GA4 button click event tag with the corresponding button click trigger.
- After testing to confirm everything works correctly, publish the GTM container which will make your tag and trigger live.
Whichever event parameters you have set in your custom event in GTM, ensure you have registered those custom dimensions in GA4 as well. This is required so that all the data captured by the tag is accessible for reporting in GA4.
Tracking Button Click Events Using a Link Click Trigger
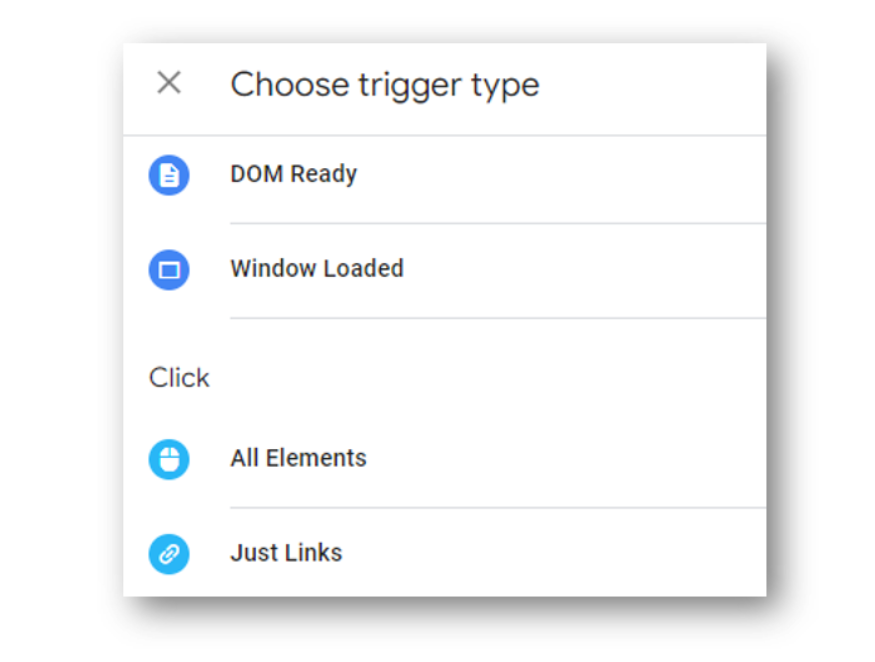
With the link click trigger, specify the trigger condition as the click destination URL of the button you want to track. For this purpose, create a new trigger in GTM and select the Just Links trigger type.
You will now see the screen shown below. Here, configure the trigger to fire on “Some link clicks” and specify the condition to fire only on the destination URL of the button click.
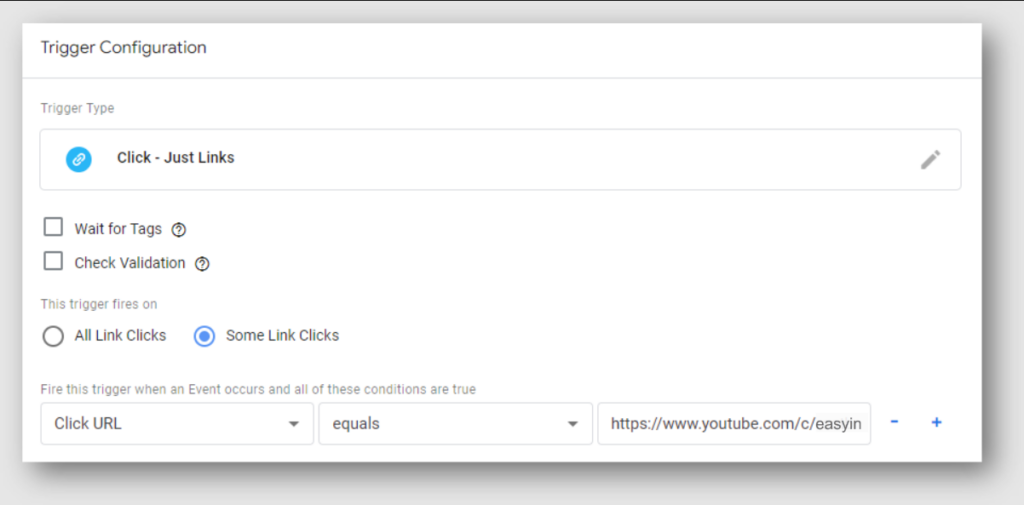
It’s important to note that this method will work only if the button click leads to a specific destination URL. If there are other ways to reach the same destination URL, this trigger will be activated each and every time, a link to that destination is clicked. Therefore, this trigger is suitable for tracking a button only if it’s the sole means of reaching the destination from the site, as in the example of tracking a subscription button for a YouTube channel.
Therefore, it makes sense to explore alternate methods for setting up a button click event.
Tracking Button Click Events Using Click Classes
Click Class refers to the value of the class attribute of the HTML element that was clicked. By using click classes in the trigger, we can track the button click event associated with a particular button.
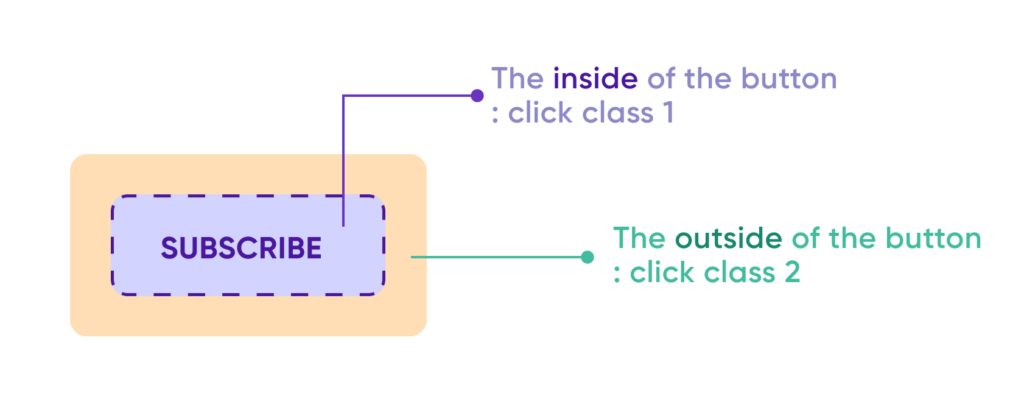
It stands to reason that there will be multiple click classes that needs to be managed in button click trigger. In the case of the Subscribe to YouTube button, one click class will control the inside of the button, where the button title is located, while another click class will control the outside of the button click.
We will need to set up two separate triggers to track this button using Click Classes with the All Elements click trigger.
Tracking the Inside of the Button Click using Click Class
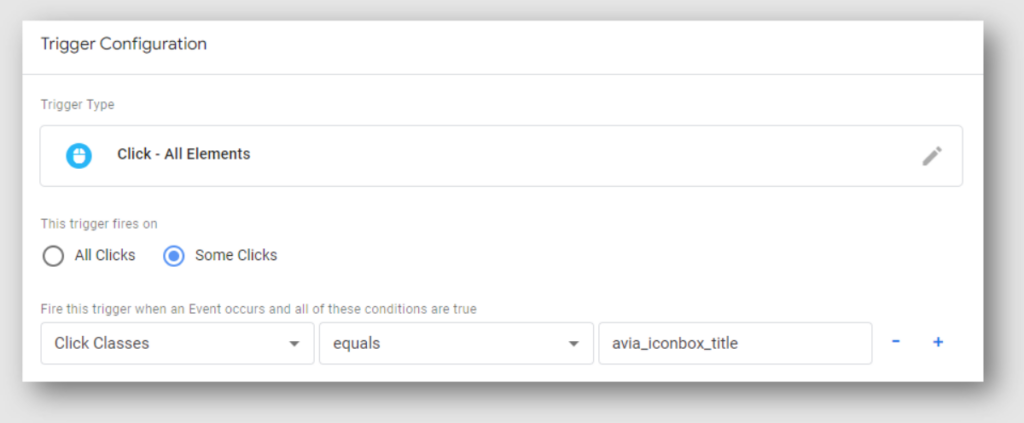
When choosing the trigger type, this time select the All Elements trigger which will enable click classes. The screen shown below will appear.
This trigger will fire on Some Clicks where the Click Class is equal to “avia_iconbox_title”.
Pro-Tip
How to use Preview and Debug in GTM to view variables’ output during target click events?
To understand why we have set Click Class as “avai_iconbox_title”, we use the Preview and Debug mode to see the output generated by variables when the target click occurs. These are the steps you need to follow –
- Open the Google Tag Manager container for the website you want to track.
- Click the Preview button in the top right corner of the screen.
- Visit the website in a new tab.
- Click on the element you want to track.
- The Variables pane will show you a list of the Variables that were output when you clicked on the element.
You can now use the Click Class Variable to create a trigger that fires when a button with a specific class is clicked.
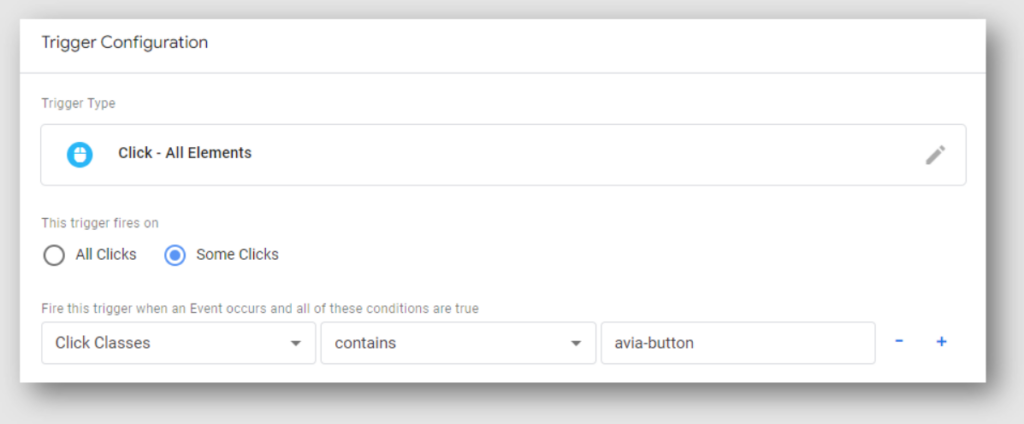
Tracking the Outside of the Button Click using Click Class
To account for clicks outside the button, a secondary trigger is necessary. This trigger captures all outside button clicks. Consider the screen below – Everything quill be the same as above (inside click) except the trigger will be fired upon detecting clicks with the Click Class attribute containing “avia_button”
If you opt to employ the Click Class approach for configuring your button click trigger, it is essential to incorporate both triggers within your corresponding GA4 button click tag. Now, let’s examine the details of that tag.
Creating the Button Click Custom Event in GA4
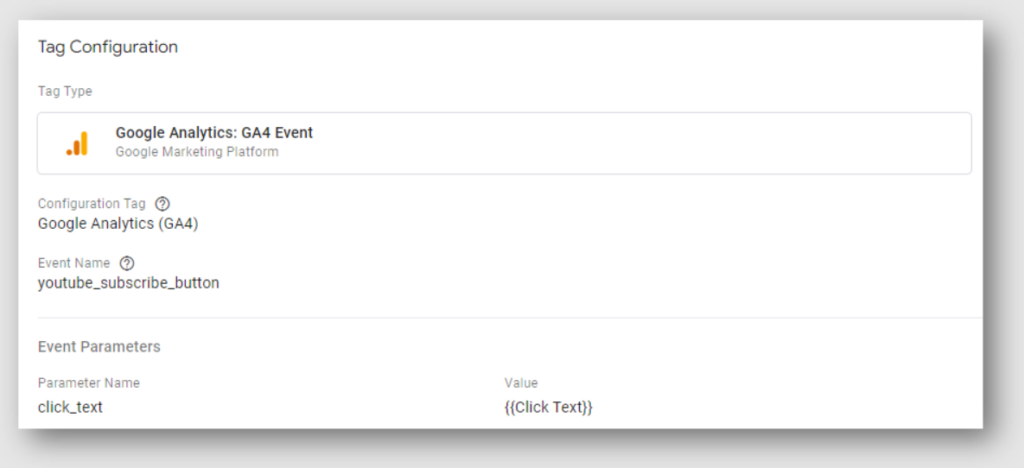
Step 1 – Setting Up Tag Configuration
- After the triggers have been created, it’s now time to create the tag. Go to the New Tag option in your container, and in the tag configuration section, choose GA4 Event as the tag type.
- The Event Name given here is what will be reflected in your GA4 data. The best practice is to keep this name as direct and concise as possible, and separated by underscores.
- The Event Parameter click_text with value {{Click Text}} will send you the name/text of the button that is clicked, which is necessary. But remember, you have to create a corresponding custom dimension in GA4 for this event parameter in order to capture the tracking data for reporting purposes
The same event name is reflected in the GA4 report.To access your events in GA4, navigate to Engagement reports and then select Events.
Step 2 – Adding Triggers that Fire the Tag
The trigger’s role is to detect a significant action, such as a button click. On the other hand, the tag is responsible for transmitting data to GA4 when the trigger is activated. Each component alone is insufficient, but when combined, they form a potent custom button click event that yields valuable data.
Below, you’ll find the button click event tag seamlessly linked with both triggers: one for inside button clicks and another for outside button clicks. However, if you opt for the link click trigger instead, only that specific trigger will be shown in this pairing.

Configuring Built-in Variables in Google Tag Manager
Here’s what Google says from their support article:
Variables in Google Tag Manager are named placeholders for values that are populated when code is run on your website or mobile app. For example, the Tag Manager variable named “Page URL” returns the current web page URL.
Herein, there are two options for the variables used in triggers: either the ‘Click URL’ variable or the ‘Click Classes’ variable. Also, if we set an event parameter when setting up the tag, we utilize the ‘Click Text’ variable. These three variables are visible in the list provided below. To enable these variables, just toggle on the relevant checkboxes.
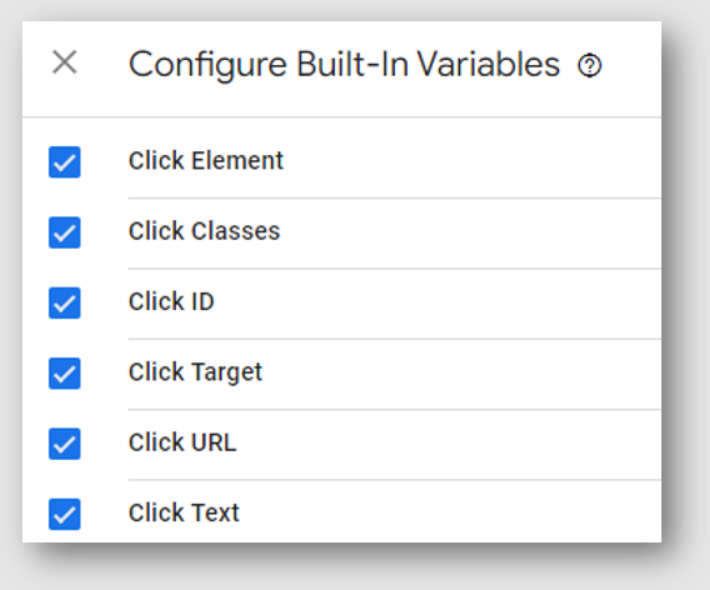
Therefore, it’s crucial that this configuration step is completed. You can verify by navigating to Variables in the left-hand navigation menu of GTM, selecting Built-In Variables, and enabling any necessary variables.
Wrapping Up
After confirming that your GA4 event tag is functioning correctly, proceed to test it in Google Tag Manager’s Preview Mode. Once you are satisfied with the results, publish the container.
For those who are still in the process of migrating from UA to GA4, I suggest taking a look at this ebook that will make your transition smooth.
About EasyInsights
EasyInsights is a comprehensive marketing analytics tool that provides end-to-end data extraction and aggregation from various marketing platforms. It generates detailed reports that offer a granular perspective of your brand’s overall marketing performance. The tool can efficiently import and combine data from multiple platforms, including Google Ads, Google Analytics, Facebook Ads, CRM tools, and Search Console.
Additional Reading – What makes EasyInsights, the next-gen marketing platform
To start, request a free dashboard setup. Our team will contact you to walk you through the process. Visit EasyInsights to learn more about our offerings.